Automatically Fetching an Identity Server Token with Yaak
[Tools, Yaak]
Long-term readers of this blog will know I have always been a keen proponent of the API testing tool Insomnia, which I vastly prefer to the usual suspect, Postman.
The maker of Insomnia subsequently sold it off, and the new owners seem to be taking it along the same path as Postman, with the addition of enterprise and group features, which is totally in order. But for me, the essence of a fast, simple API testing tool is getting lost in translation.
Greg, the original author, subsequently decided to build another REST client, Yaak.
A common issue when testing APIs is the requirement for an access token to access an authenticated endpoint.
One of Insomnia’s features is the ability to specify scripts that run pre- or post-request. This could be used to solve the above problem.
Yaak does not have this.
It does, however, have a feature that helps achieve this: request chaining.
It works as follows:
First, create an endpoint that is responsible for fetching the authentication token.
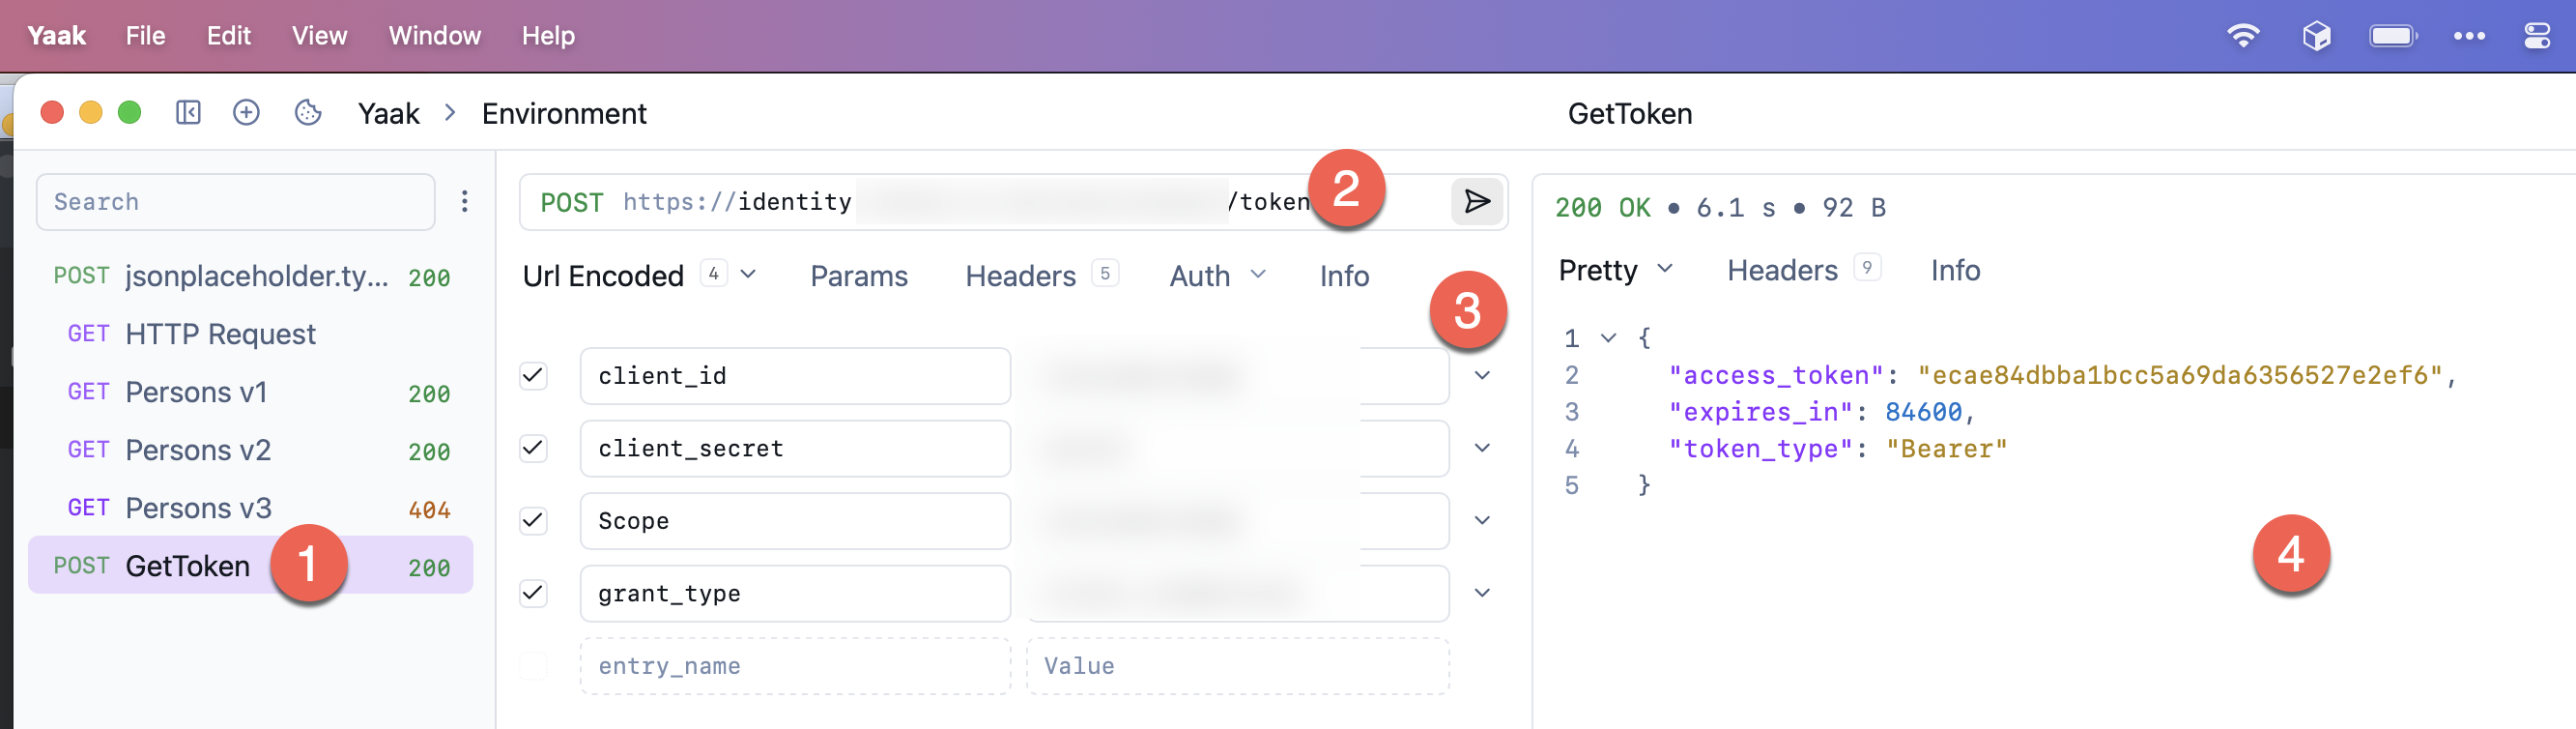
Here we specify the following:
- Name of the request (a POST request)
- The URL to the endpoint
- The OAUTH parameters
Once we submit the request, we get back the token in the following JSON response:
{
  "access_token": "ecae84dbba1bcc5a69da6356527e2ef6",
  "expires_in": 84600,
  "token_type": "Bearer"
}
With that in place, the next order of business is to set up the request chain.
Typically, you would have a bunch of APIs you want to authenticate with the same credentials, in which case you would want to set up the token at the global level.
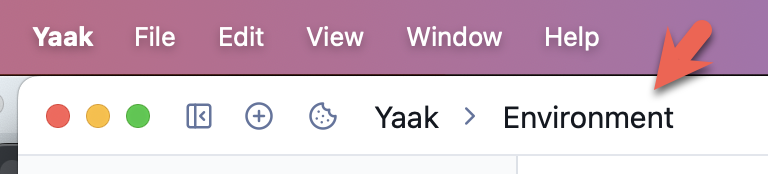
At the very tip of the application, click the Environment section:
You will see the following menu:

From here, we go on to create our variable, in this case, AccessToken, by simply typing the name in the section VAR_NAME:

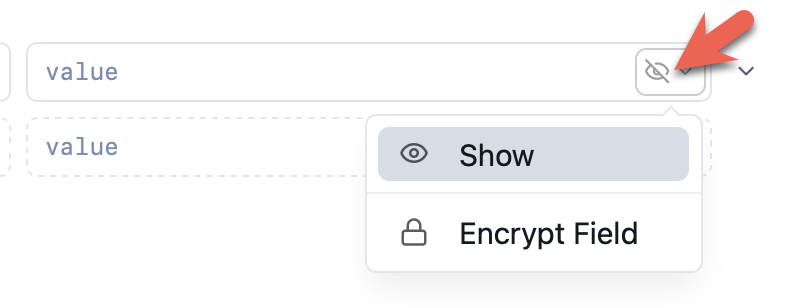
By default, the value is encrypted. We can change that by clicking on the following icon and choosing Show from the menu.
Next is to define the expression that we want, which in this case is the following:
response.body.path()
The expression is how we capture our desired element(s) from the returned JSON.
You will see the value change from text to have a highlight indicating further configuration is possible:

If you click on the highlighted text you get the following screen:
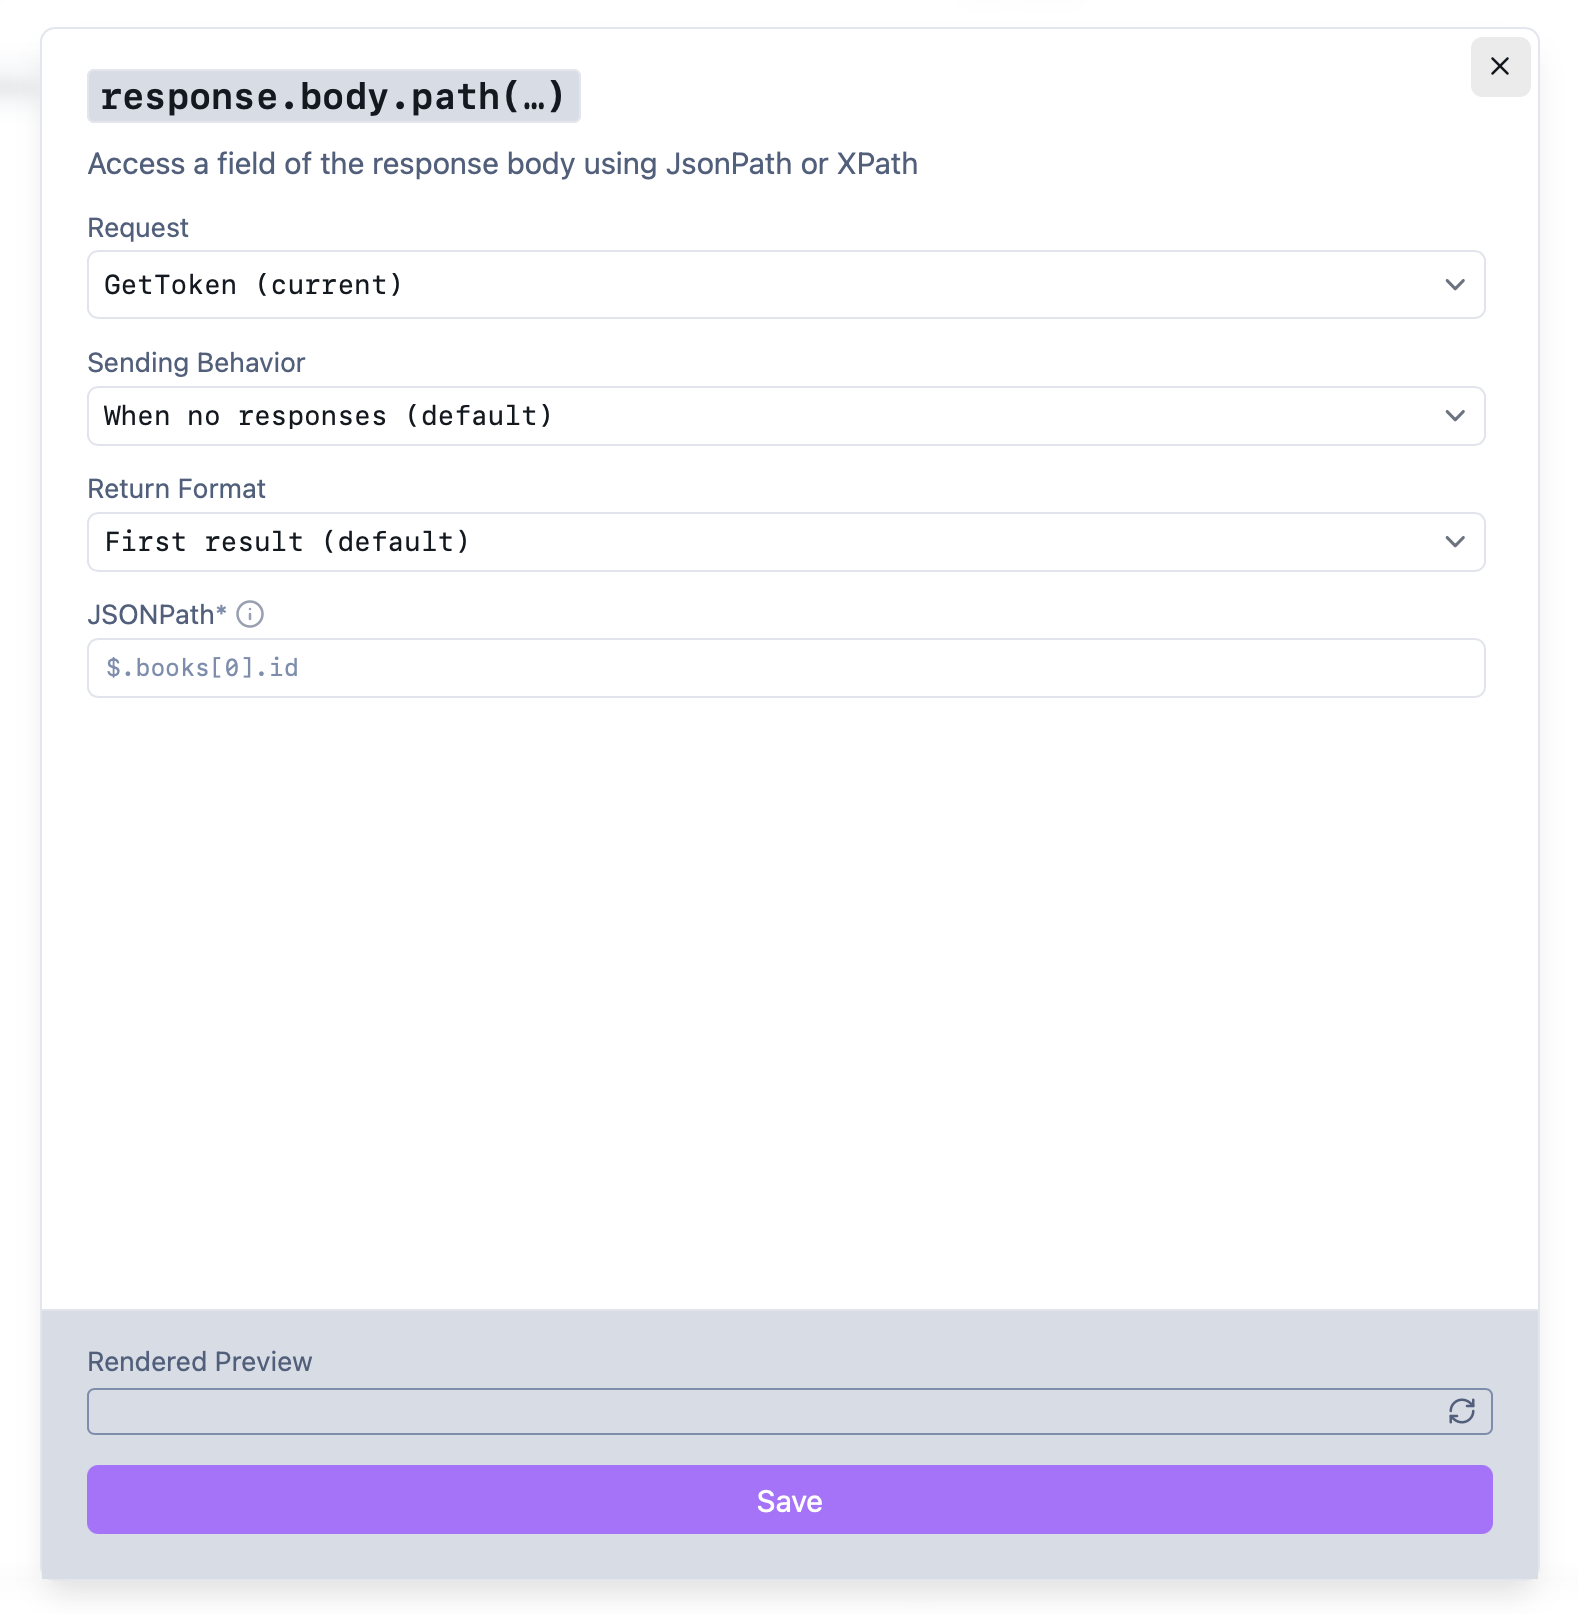
First, we choose the endpoint that we want to invoke (that we defined and named earlier)
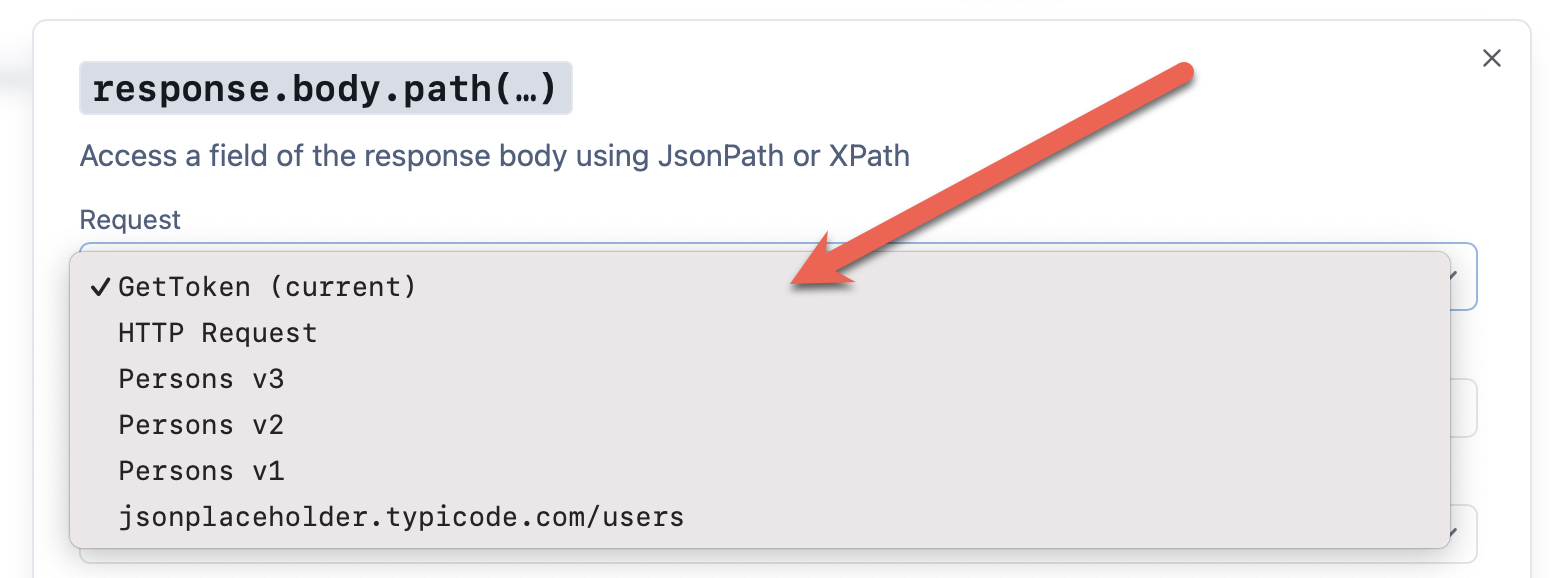
Next, we decide how often to invoke the endpoint.
We don’t want to invoke it all the time, so we set the timeout to what we get back from the token server.
The JSON was as follows:
{
  "access_token": "ecae84dbba1bcc5a69da6356527e2ef6",
  "expires_in": 84600,
  "token_type": "Bearer"
}
So from this, we specify the timeout as 84600:

Here we are saying the token expires after 84600 seconds, and only then should another be requested.
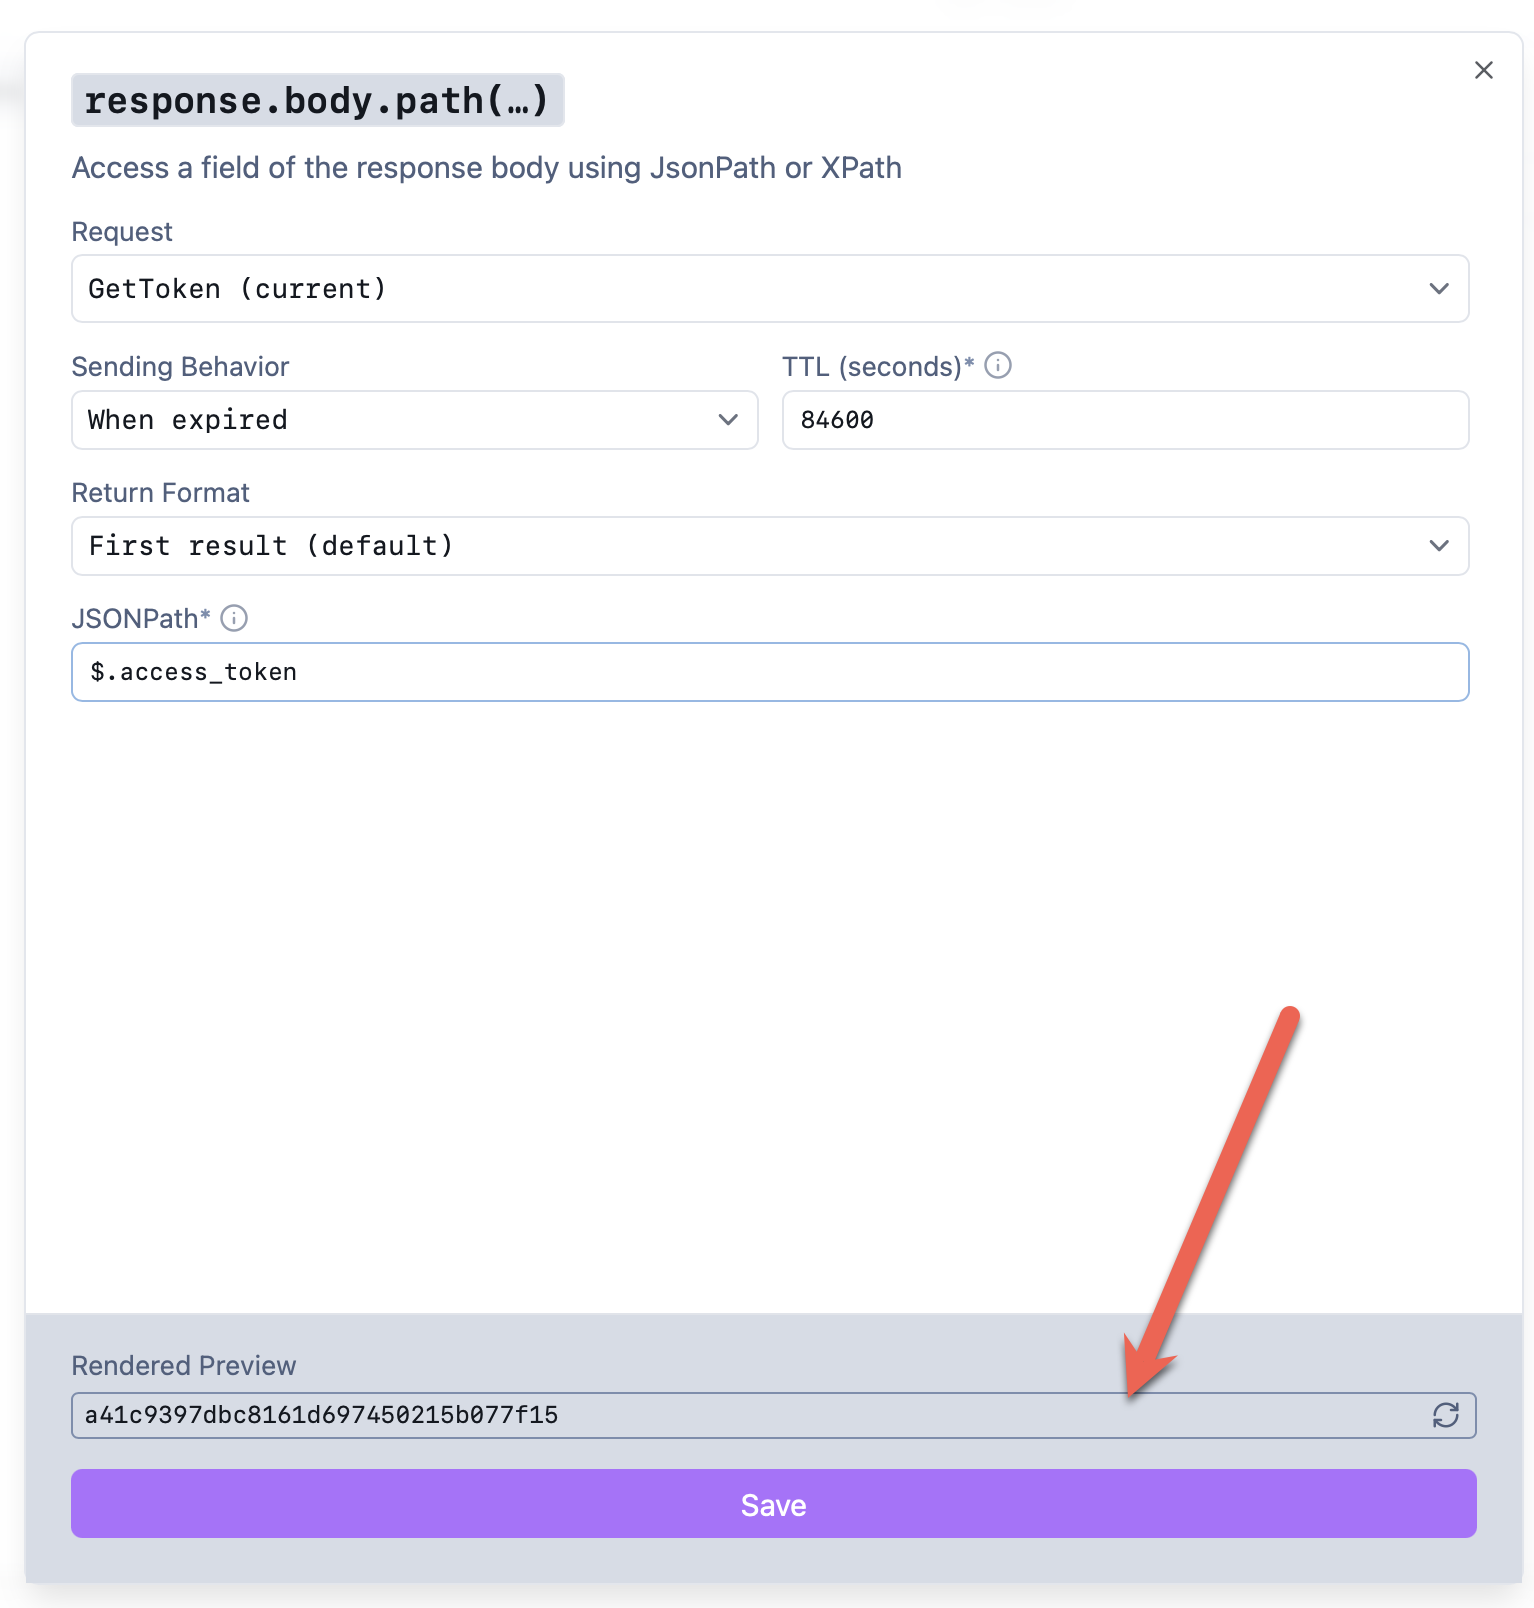
Next, we tell Yaak about the shape of the response.
In this case, we do not expect a collection, but a single response, and so we indicate as follows:

Then, finally, we write an expression that extracts the value we want from the JSON.
In this case, that expression is:
$.access_token
This is because the access_token value is at the root level of the response.

If all goes well, you should be able to see a response in the preview:
Almost there.
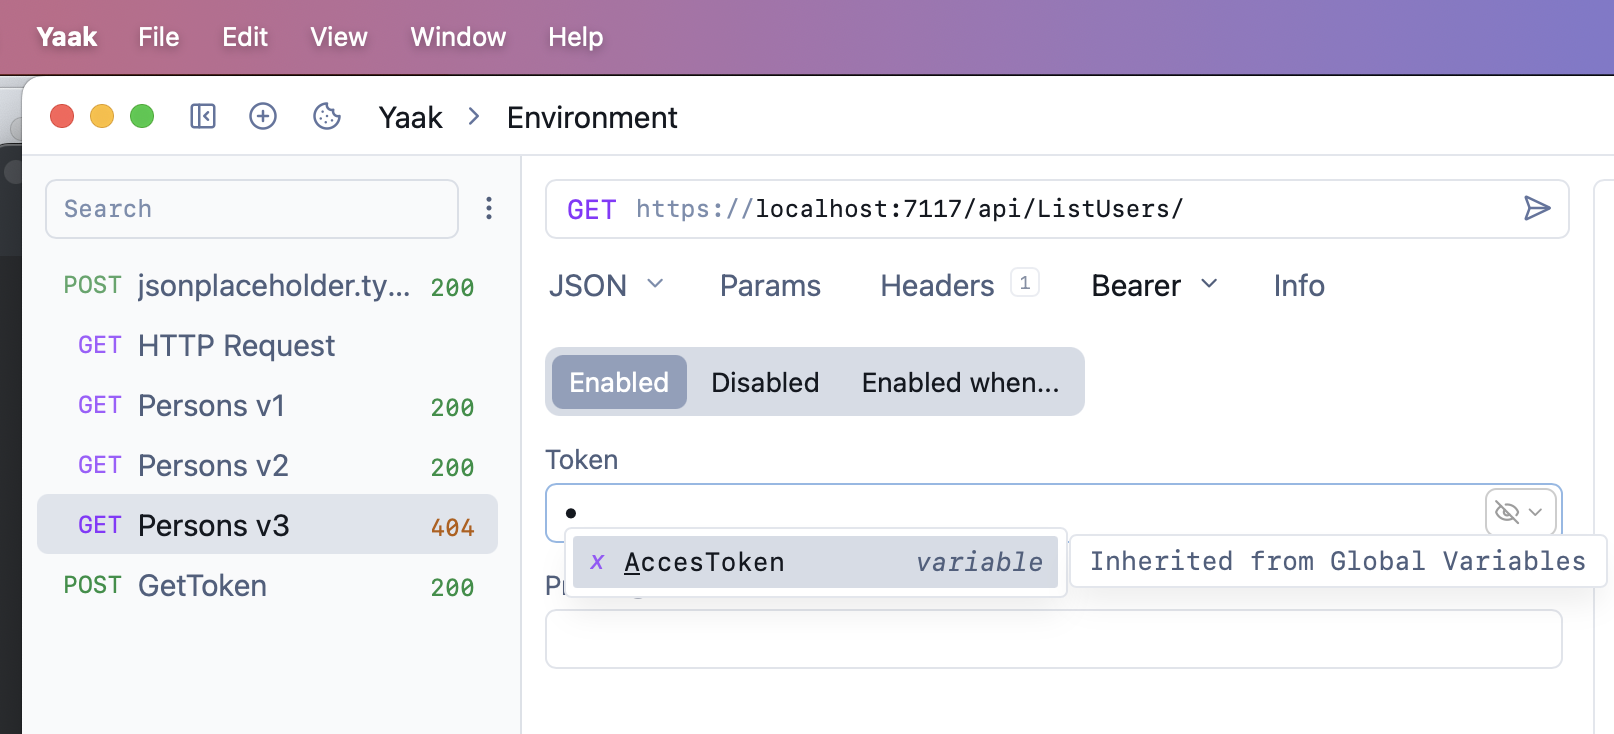
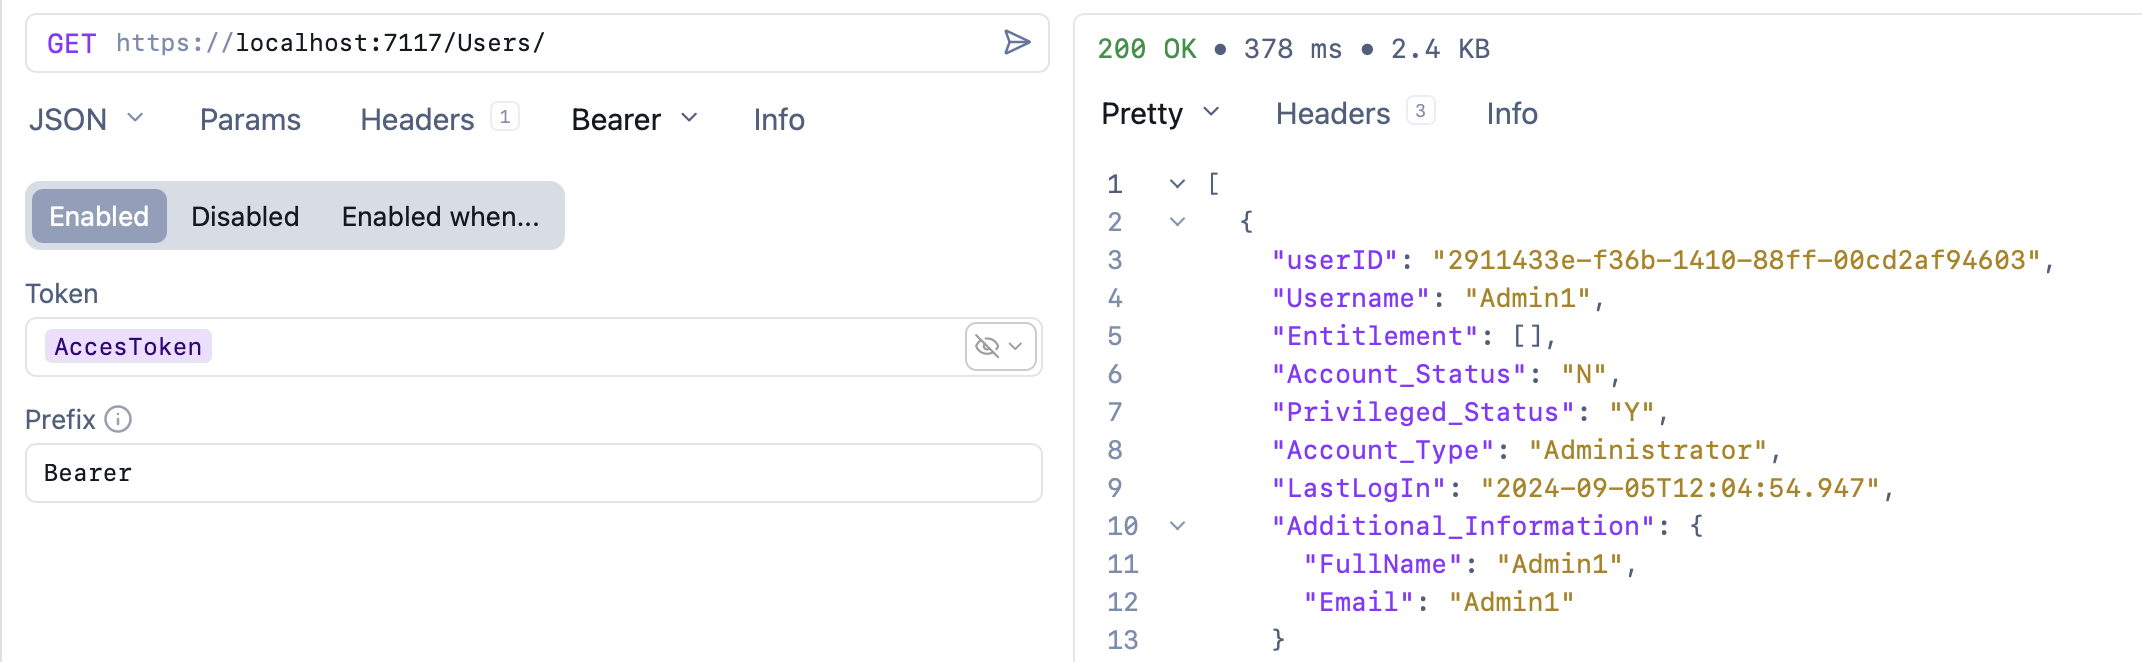
Finally, in the endpoint you want to authenticate, navigate to the Auth section and choose Bearer Token from the menu:

From here we start to type AccessToken, and the autocomplete should find the variable for us:
Finally, we specify the Bearer prefix:
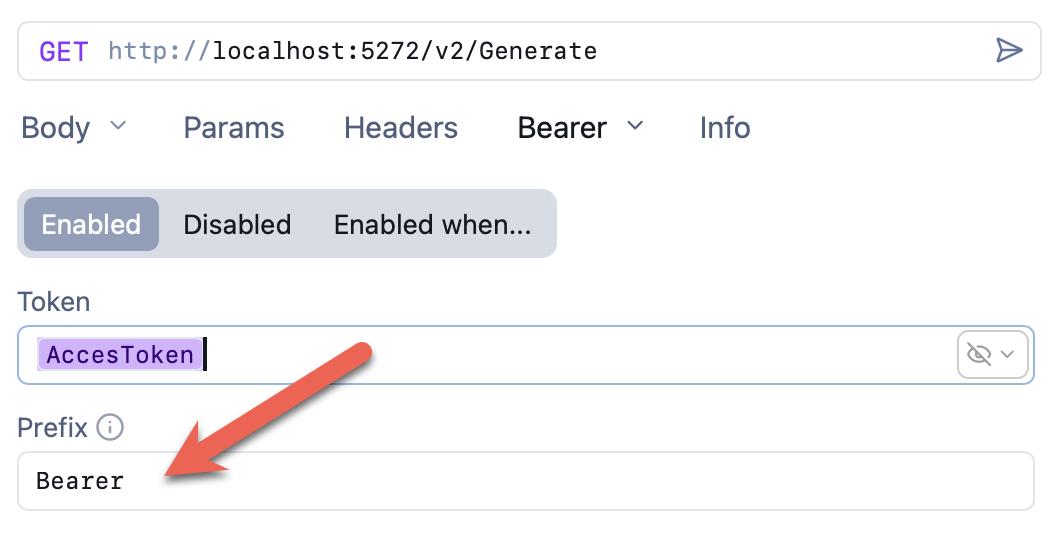
If we run this, we should see results:
TLDR
Yaak supports request chaining as a technique for calling requests from other requests and capturing responses.
Happy hacking!