Designing, Building & Packaging A Scalable, Testable .NET Open Source Component - Part 3 - Project Setup
[.NET, C#, OpenSource, Design]
This is Part 3 of a series on Designing, Building & Packaging A Scalable, Testable .NET Open Source Component.
- Designing, Building & Packaging A Scalable, Testable .NET Open Source Component - Part 1 - Introduction
- Designing, Building & Packaging A Scalable, Testable .NET Open Source Component - Part 2 - Basic Requirements
- Designing, Building & Packaging A Scalable, Testable .NET Open Source Component - Part 3 - Project Setup (This Post)
- Designing, Building & Packaging A Scalable, Testable .NET Open Source Component - Part 4 - Types & Contracts
- Designing, Building & Packaging A Scalable, Testable .NET Open Source Component - Part 5 - Component Implementation
- Designing, Building & Packaging A Scalable, Testable .NET Open Source Component - Part 6 - Mocking & Behaviour Tests
- Designing, Building & Packaging A Scalable, Testable .NET Open Source Component - Part 7 - Sequence Verification With Moq
- Designing, Building & Packaging A Scalable, Testable .NET Open Source Component - Part 8 - Compressor Implementation
- Designing, Building & Packaging A Scalable, Testable .NET Open Source Component - Part 9 - Encryptor Implementation
- Designing, Building & Packaging A Scalable, Testable .NET Open Source Component - Part 10 - In Memory Storage
- Designing, Building & Packaging A Scalable, Testable .NET Open Source Component - Part 11 - SQL Server Storage
- Designing, Building & Packaging A Scalable, Testable .NET Open Source Component - Part 12 - PostgreSQL Storage
- Designing, Building & Packaging A Scalable, Testable .NET Open Source Component - Part 13 - Database Configuration
- Designing, Building & Packaging A Scalable, Testable .NET Open Source Component - Part 14 - Virtualizing Infrastructure
- Designing, Building & Packaging A Scalable, Testable .NET Open Source Component - Part 15 - Test Organization
- Designing, Building & Packaging A Scalable, Testable .NET Open Source Component - Part 16 - Large File Consideration
- Designing, Building & Packaging A Scalable, Testable .NET Open Source Component - Part 17 - Large File Consideration On PostgreSQL
- Designing, Building & Packaging A Scalable, Testable .NET Open Source Component - Part 18 - Azure Blob Storage
- Designing, Building & Packaging A Scalable, Testable .NET Open Source Component - Part 19 - Testing Azure Blob Storage Locally
- Designing, Building & Packaging A Scalable, Testable .NET Open Source Component - Part 20 - Amazon S3 Storage
- Designing, Building & Packaging A Scalable, Testable .NET Open Source Component - Part 21 - Testing Amazon S3 Storage Locally
- Designing, Building & Packaging A Scalable, Testable .NET Open Source Component - Part 22 - Refactoring Azure Storage Engine For Initialization
- Designing, Building & Packaging A Scalable, Testable .NET Open Source Component - Part 23 - Refactoring Amazon Storage Engine For Initialization
- Designing, Building & Packaging A Scalable, Testable .NET Open Source Component - Part 24 - Google Cloud Storage
In our last post, we outlined the basic requirements.
In this post, we will set up our project.
NOTE: You do not carry out the steps outlined in this post yourself - you can just check out the code from GitHub like so:
git clone https://github.com/conradakunga/UploadFileManager.git
The rest of this post is if you want to learn to set up a project yourself, via the command line. Almost everything done here around project creation can be accomplished using an IDE like JetBrains Rider or Microsoft Visual Studio.
First, we will create an empty directory to store our projects.
mkdir UploadFileManager/
We will also create a solution file in the new folder.
dotnet new sln
Next, we will turn our attention to a common problem that can inadvertently trip you up.
If you have multiple projects in a solution, each project has its own build configuration and installed packages. What happens when these are out of sync inadvertently? Project A is .NET 8 and B is .NET 9 and A depends on B? Or A is using version 1 of a package and B is using version 2?
Central package management is the solution to this problem.
First, we run the following command to create the file that stores centrally the packages used in our component.
dotnet new packagesprops
This will create a file named Directory.Packages.props with the following contents:
<Project>
  <PropertyGroup>
    <!-- Enable central package management, https://learn.microsoft.com/en-us/nuget/consume-packages/Central-Package-Management -->
    <ManagePackageVersionsCentrally>true</ManagePackageVersionsCentrally>
  </PropertyGroup>
  <ItemGroup>
  </ItemGroup>
</Project>
Next run the following command:
dotnet new buildprops
This will create a file named Directory.Build.props in the folder.
It will have the following contents:
<Project>
  <!-- See https://aka.ms/dotnet/msbuild/customize for more details on customizing your build -->
  <PropertyGroup>


  </PropertyGroup>
</Project>
Next we will create the projects for our component.
First is the project for the component itself, a class library.
dotnet new classlib -o src/UploadFileManager
This will create two folders - src, and within that, UploadFileManger. In this folder it will create the project and its files.
Next, we create the project for the tests.
dotnet new xunit -o tests/UploadFileManagerTests
This will create two folders - tests, and within that UploadFileManagerTests. In this folder it will create the xUnit test project and its files.
Finally we add these projects to the solution.
dotnet sln add tests/UploadFileManagerTests/
dotnet sln add src/UploadFileManager/
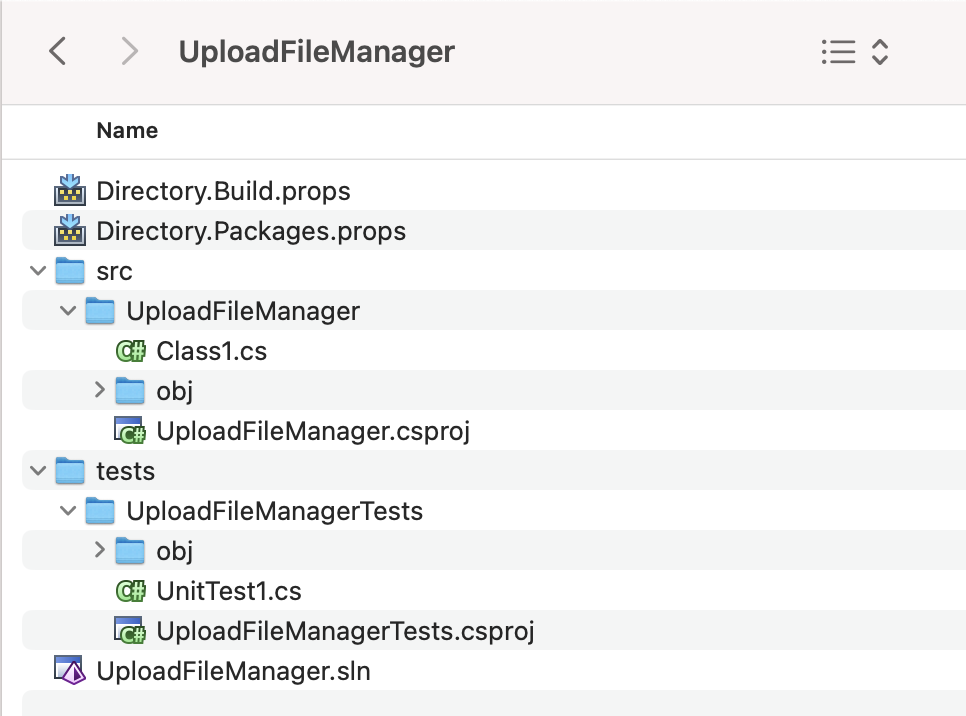
Our file structure should be as follows:
Let us now try to build the solution.
dotnet build
We get the following error:
/Users/rad/Projects/UploadFileManager/tests/UploadFileManagerTests/UploadFileManagerTests.csproj : error NU1008: Projects that use central package version management should not define the version on the PackageReference items but on the PackageVersion items: coverlet.collector;Microsoft.NET.Test.Sdk;xunit;xunit.runner.visualstudio.
This is because we have configured central package management but the generated project files directly specify the versions.
We need to update the test .csproj file.
Currently it is like this:
<Project Sdk="Microsoft.NET.Sdk">

  <PropertyGroup>
    <TargetFramework>net9.0</TargetFramework>
    <ImplicitUsings>enable</ImplicitUsings>
    <Nullable>enable</Nullable>
    <IsPackable>false</IsPackable>
  </PropertyGroup>

  <ItemGroup>
    <PackageReference Include="coverlet.collector" Version="6.0.2" />
    <PackageReference Include="Microsoft.NET.Test.Sdk" Version="17.12.0" />
    <PackageReference Include="xunit" Version="2.9.2" />
    <PackageReference Include="xunit.runner.visualstudio" Version="2.8.2" />
  </ItemGroup>

  <ItemGroup>
    <Using Include="Xunit" />
  </ItemGroup>

</Project>
The simplest way is to delete all the PackageReferences and add them again afresh via command line.
dotnet add package coverlet.collector
dotnet add package Microsoft.NET.Test.Sdk
dotnet add package xunit
dotnet add package xunit.runner.visualstudio
The file now will look like this:
<Project Sdk="Microsoft.NET.Sdk">

  <PropertyGroup>
    <TargetFramework>net9.0</TargetFramework>
    <ImplicitUsings>enable</ImplicitUsings>
    <Nullable>enable</Nullable>
    <IsPackable>false</IsPackable>
  </PropertyGroup>

  <ItemGroup>
    <Using Include="Xunit" />
  </ItemGroup>

  <ItemGroup>
    <PackageReference Include="coverlet.collector">
      <IncludeAssets>runtime; build; native; contentfiles; analyzers; buildtransitive</IncludeAssets>
      <PrivateAssets>all</PrivateAssets>
    </PackageReference>
    <PackageReference Include="Microsoft.NET.Test.Sdk" />
    <PackageReference Include="xUnit" />
    <PackageReference Include="xunit.runner.visualstudio">
      <IncludeAssets>runtime; build; native; contentfiles; analyzers; buildtransitive</IncludeAssets>
      <PrivateAssets>all</PrivateAssets>
    </PackageReference>
  </ItemGroup>

</Project>
Not that there are no version numbers here, unlike before.
The file Directory.Packages.props now looks like this:
<Project>
  <PropertyGroup>
    <!-- Enable central package management, https://learn.microsoft.com/en-us/nuget/consume-packages/Central-Package-Management -->
    <ManagePackageVersionsCentrally>true</ManagePackageVersionsCentrally>
  </PropertyGroup>
  <ItemGroup>
  </ItemGroup>
  <ItemGroup>
    <PackageVersion Include="coverlet.collector" Version="6.0.4">
      <IncludeAssets>runtime; build; native; contentfiles; analyzers; buildtransitive</IncludeAssets>
      <PrivateAssets>all</PrivateAssets>
    </PackageVersion>
    <PackageVersion Include="Microsoft.NET.Test.Sdk" Version="17.13.0" />
    <PackageVersion Include="xUnit" Version="2.9.3" />
    <PackageVersion Include="xunit.runner.visualstudio" Version="3.0.2">
      <IncludeAssets>runtime; build; native; contentfiles; analyzers; buildtransitive</IncludeAssets>
      <PrivateAssets>all</PrivateAssets>
    </PackageVersion>
  </ItemGroup>
</Project>
Not that this file now has the version numbers, so if any project uses any of these packages, that is the version that will get used.
If we now build, it will succeed.

There are a couple of other packages we need to add to the test project:
- AwesomeAssertions - for writing easy to read test assertions
- Moq - for writing mocks
dotnet add package AwesomeAssertions
dotnet add package Moq
Finally, we need to centralize some of the project properties.
Here is an excerpt of the test project:
  <PropertyGroup>
    <TargetFramework>net9.0</TargetFramework>
    <ImplicitUsings>enable</ImplicitUsings>
    <Nullable>enable</Nullable>
    <IsPackable>false</IsPackable>
  </PropertyGroup>
And this is of the UploadManager project:
<PropertyGroup>
    <TargetFramework>net9.0</TargetFramework>
    <ImplicitUsings>enable</ImplicitUsings>
    <Nullable>enable</Nullable>
  </PropertyGroup>
We can extract the common elements to the Directory.Build.props file.
It now will look like this:
<Project>
  <!-- See https://aka.ms/dotnet/msbuild/customize for more details on customizing your build -->
  <PropertyGroup>
      <TargetFramework>net9.0</TargetFramework>
      <ImplicitUsings>enable</ImplicitUsings>
      <Nullable>enable</Nullable>
  </PropertyGroup>
</Project>
Our test .csproj now looks like this:
<Project Sdk="Microsoft.NET.Sdk">

  <PropertyGroup>
    <IsPackable>false</IsPackable>
  </PropertyGroup>

  <ItemGroup>
    <Using Include="Xunit" />
  </ItemGroup>

  <ItemGroup>
    <PackageReference Include="AwesomeAssertions" />
    <PackageReference Include="AwesomeAssertions.Analyzers">
      <PrivateAssets>all</PrivateAssets>
      <IncludeAssets>runtime; build; native; contentfiles; analyzers; buildtransitive</IncludeAssets>
    </PackageReference>
    <PackageReference Include="coverlet.collector">
      <IncludeAssets>runtime; build; native; contentfiles; analyzers; buildtransitive</IncludeAssets>
      <PrivateAssets>all</PrivateAssets>
    </PackageReference>
    <PackageReference Include="Microsoft.NET.Test.Sdk" />
    <PackageReference Include="Moq" />
    <PackageReference Include="xUnit" />
    <PackageReference Include="xunit.runner.visualstudio">
      <IncludeAssets>runtime; build; native; contentfiles; analyzers; buildtransitive</IncludeAssets>
      <PrivateAssets>all</PrivateAssets>
    </PackageReference>
  </ItemGroup>

</Project>
And our UploadFileManager .csproj now looks like this:
<Project>
  <PropertyGroup>
    <!-- Enable central package management, https://learn.microsoft.com/en-us/nuget/consume-packages/Central-Package-Management -->
    <ManagePackageVersionsCentrally>true</ManagePackageVersionsCentrally>
  </PropertyGroup>
  <ItemGroup>
  </ItemGroup>
  <ItemGroup>
    <PackageVersion Include="coverlet.collector" Version="6.0.4">
      <IncludeAssets>runtime; build; native; contentfiles; analyzers; buildtransitive</IncludeAssets>
      <PrivateAssets>all</PrivateAssets>
    </PackageVersion>
    <PackageVersion Include="Microsoft.NET.Test.Sdk" Version="17.13.0" />
    <PackageVersion Include="xUnit" Version="2.9.3" />
    <PackageVersion Include="xunit.runner.visualstudio" Version="3.0.2">
      <IncludeAssets>runtime; build; native; contentfiles; analyzers; buildtransitive</IncludeAssets>
      <PrivateAssets>all</PrivateAssets>
    </PackageVersion>
  </ItemGroup>
</Project>
Finally, we can add the requirements captured on our last post as a markdown file, Readme.md.
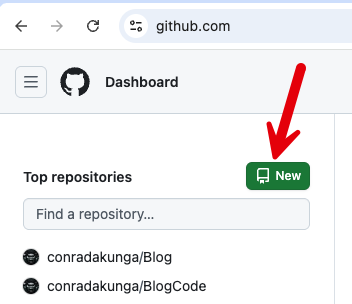
The last step in the journey is to create a Github repository for our project.
Go to the GitHub site and click the following button:
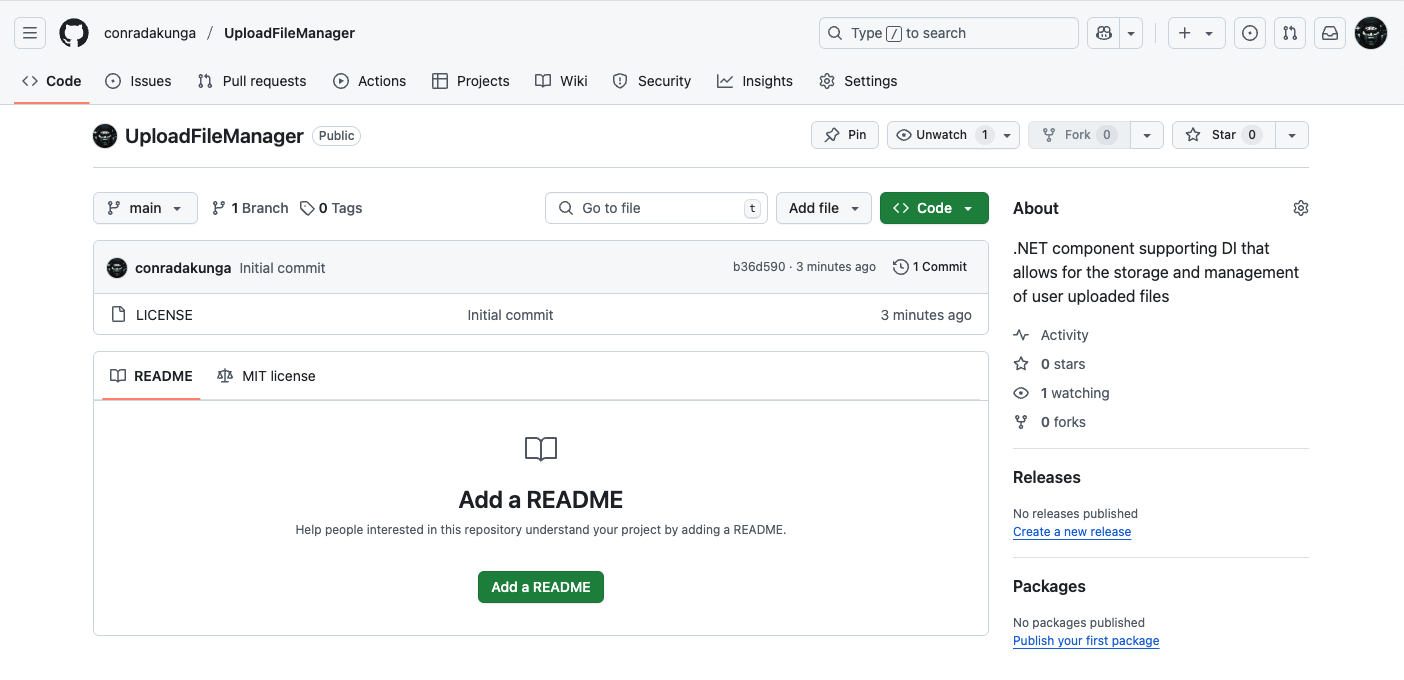
Next we provide some information about the repository.
For now, I have chosen the MIT license but to be honest, I haven’t thought all that much about it.
The new repository will look like this:
Next is a bunch of commands to setup the local repository to push to the remote
# Add the remote
git remote add origin https://github.com/conradakunga/UploadFileManager.git
# Set the local branches to mirror the upstream ones
git branch --set-upstream-to=origin/main main
# Set the repository to merge by default
git config pull.rebase false
# Pull & merge the latest chanages
git pull
# Push the code
git push
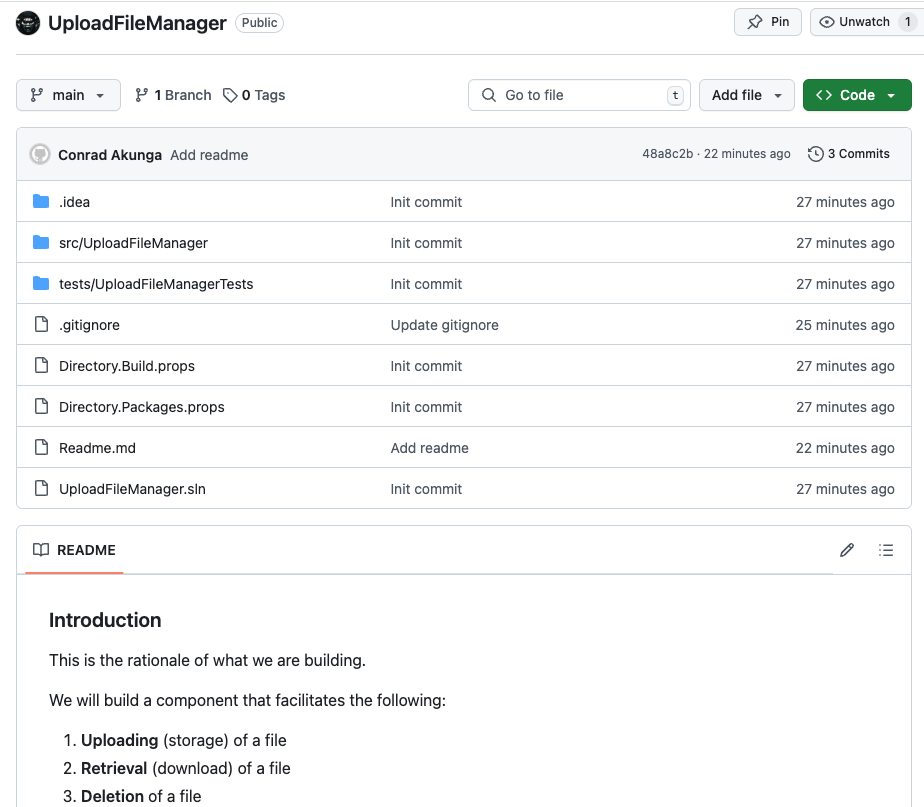
The final repo will look like this, with all our code pushed.
In our next post, we shall begin to implement some types and contracts.
TLDR
This post sets up the project in readiness for the implementation.
The code is in my GitHub.
Happy hacking!