Sending Email In C# & .NET - Part 13 - Sending Email With Inline Attachments Using MailKit
[C#, .NET, Email, StarLibrary, MailKit]
This is part 13 of a series on sending Email
- Sending Email in C# & .NET - Part 1 - Introduction
- Sending Email in C# & .NET - Part 2 - Delivery
- Sending Email in C# & .NET - Part 3 - Using Gmail
- Sending Email In C# & .NET - Part 4 - Using Office 365 & MS Graph API
- Sending Email In C# & .NET - Part 5 - Using Google Cloud API
- Sending Email In C# & .NET - Part 6 - Testing SMTP Locally Using PaperCut
- Sending Email In C# & .NET - Part 7 - Sending Inline Images Using SMTP
- Sending Email In C# & .NET - Part 8 - Sending HTML Email Using SMTP
- Sending Email In C# & .NET - Part 9 - Sending Multiple Format Email Using SMTP
- Sending Email In C# & .NET - Part 10 - Sending Plain Text Email Using MailKit
- Sending Email In C# & .NET - Part 11 - Sending HTML Email Using MailKit
- Sending Email In C# & .NET - Part 12 - Sending Email With Attachments Using MailKit
- Sending Email In C# & .NET - Part 13 - Sending Email With Inline Attachments Using MailKit (This post)
- Sending Email In C# & .NET - Part 14 - Sending Multiple Format Email Using MailKit
- Sending Email In C# & .NET - Part 15 - Sending Calendar Invites Using MailKit
- Sending Email In C# & .NET - Part 16 - Testing SMTP Locally Using Mailpit
In our last post, “Sending Email In C# & .NET - Part 12 - Sending Email With Attachments Using MailKit”, we looked at how to send email with attachments using MailKit.
In this post, we will look at how to send email with inline attachments (images).
The process is as follows:
- Create a
MimeMessage - Create one (or more)
MailboxAddressfor the recipients and add to theTocollection of theMimeMessage - Create one
MailboxAddressfor the sender and add it to theFromcollection of theMimeMessage - Set the
Subjectof theMimeMessage - Create a
BodyBuilder - Add one or more
LinkedResourcesto theBodyBuilder - Set the body text from the
BodyBuilder - Send the message using the
SmtpClient. This is theSmtpClientfromMailKit, not the one in System.Net.
The code is as follows:
using MailKit.Net.Smtp;
using MimeKit;
using MimeKit.Utils;
using Serilog;

// Configure logging to the console
Log.Logger = new LoggerConfiguration()
    .WriteTo.Console()
    .CreateLogger();

// Create the email
var message = new MimeMessage();
// Add the sender
message.From.Add(new MailboxAddress("James Bond", "james@mi5.org"));
// Set the recipient
message.To.Add(new MailboxAddress("M", "m@mi5.org"));
// Set the email subject
message.Subject = "Birthday Wishes";

var builder = new BodyBuilder();

// Create a LinkedResource with the image
var image1 = builder.LinkedResources.Add("Bond1.jpeg");
// Generate an ID for use in linkage
image1.ContentId = MimeUtils.GenerateMessageId();
// Generate a second ID for use in linkage
var image2 = builder.LinkedResources.Add("Bond2.jpeg");
image2.ContentId = MimeUtils.GenerateMessageId();

// Build the html version of the message text using the IDs
var body = $"""
            <p>Dear M,<br>
            <p>Happy birthday!<br>
            <p>Warmest regards of the day<br>
            <p>Find attached my favourite pictures<br>
            <p>-- Joey<br>
            <center>
            <img src="cid:{image1.ContentId}">
            <img src="cid:{image2.ContentId}">
            </center>
            """;
// Set the html body
builder.HtmlBody = body;

// Set the message body
message.Body = builder.ToMessageBody();

// Now send the email
using (var client = new SmtpClient())
{
    Log.Information("Connecting to smtp server...");
    await client.ConnectAsync("localhost", 25, false);
    // Typically, authenticate here. But we are using PaperCut
    //await client.AuthenticateAsync("username", "password");
    await client.SendAsync(message);
    Log.Information("Sent message");
    await client.DisconnectAsync(true);
    Log.Information("Disconnected from server");
}
The BodyBuilder class here is much easier to use than directly manipulating the TextPart and MimePart objects.
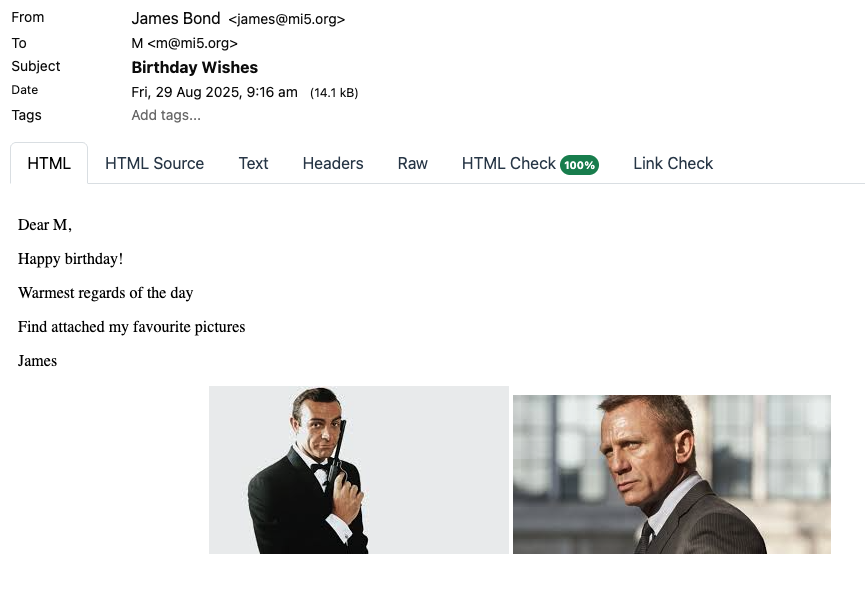
If we run this code, the email will look like this:

Naturally, inline images are only supported for HTML email.
TLDR
MimeKit supports sending of inline images for HTML using the BodyBuilder object.
The code is in my GitHub.
Happy hacking!