Viewing Redis Data with JetBrains DataGrip
[Tools, Redis]
In our previous post, “Storing Data In Redis With Command Line”, we looked at how to setup a Redis image for cache purposes, and how to connect to it, insert and retrieve data.
In this post we will look at how to use my go-to database tool, JetBrains DataGrip, to view and manage data stored in Redis.
First, download, install and then launch software.
Our next step is to configure it to understand and connect to Redis.
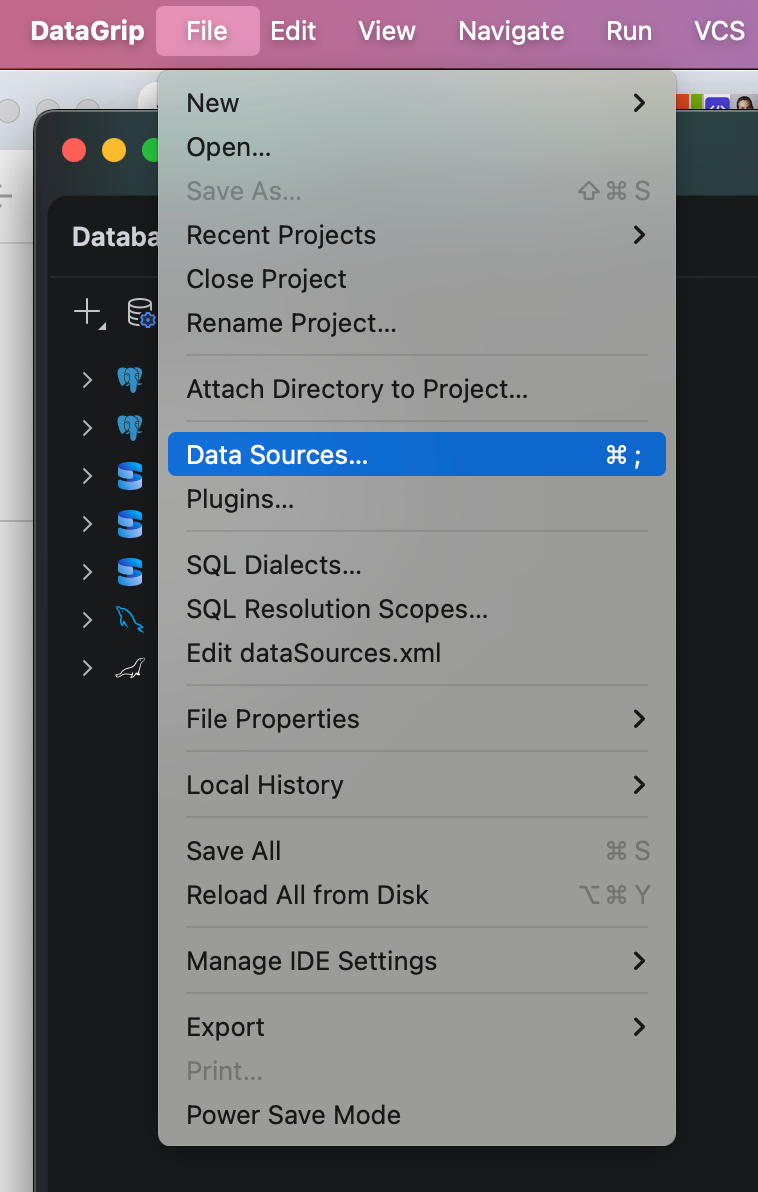
From the main menu, go to the Data Sources menu.
From there, click the Drivers icon:
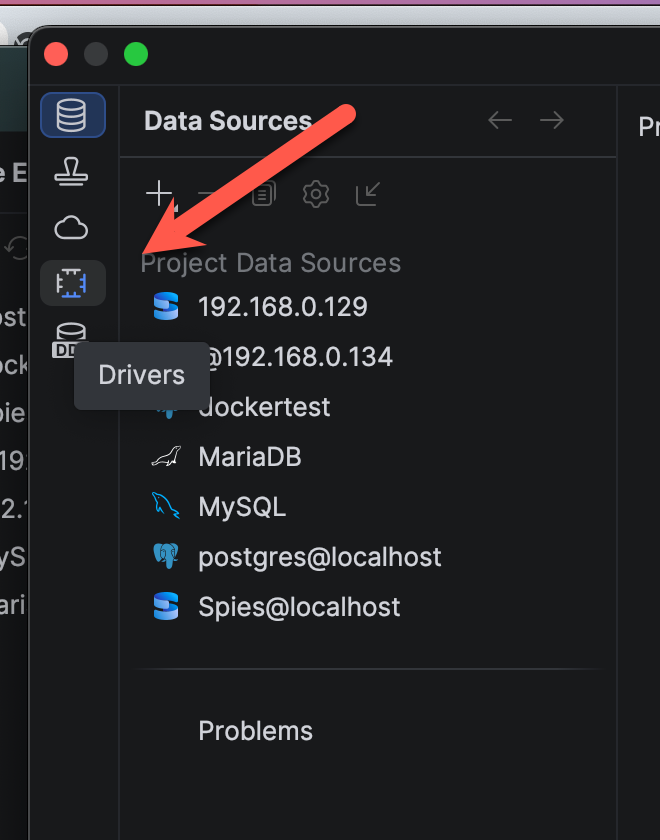
You will be presented with a list of supported drivers from a number of databases.
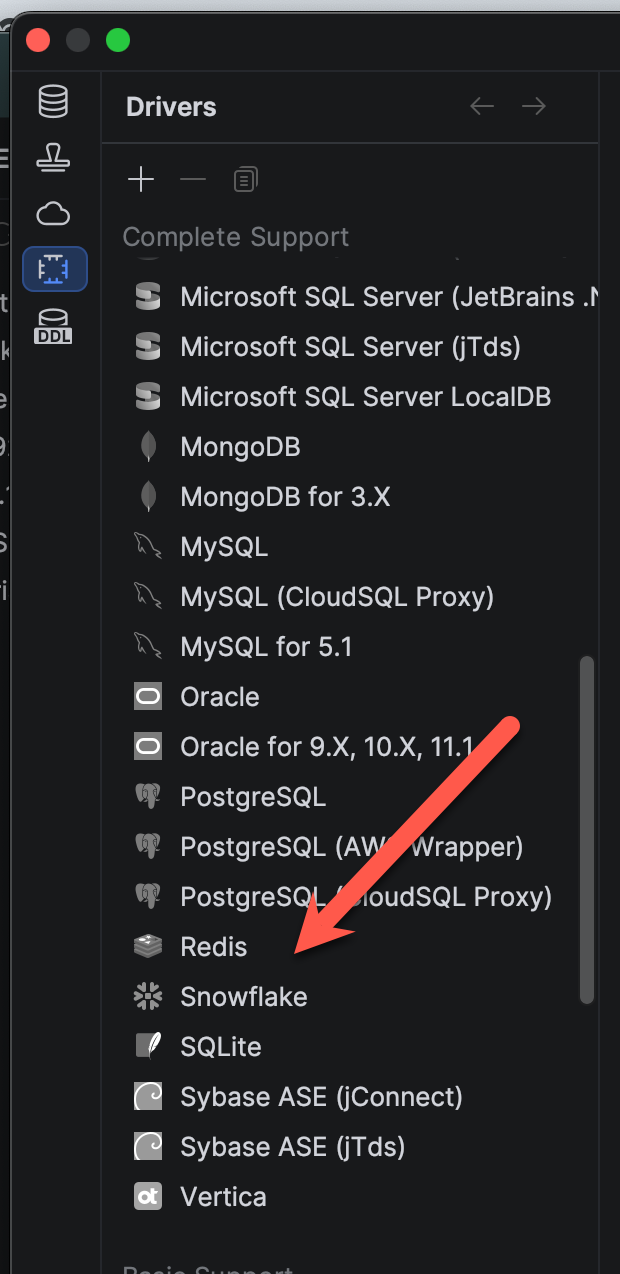
Choose Redis.
Proceed to choose the latest stable version.
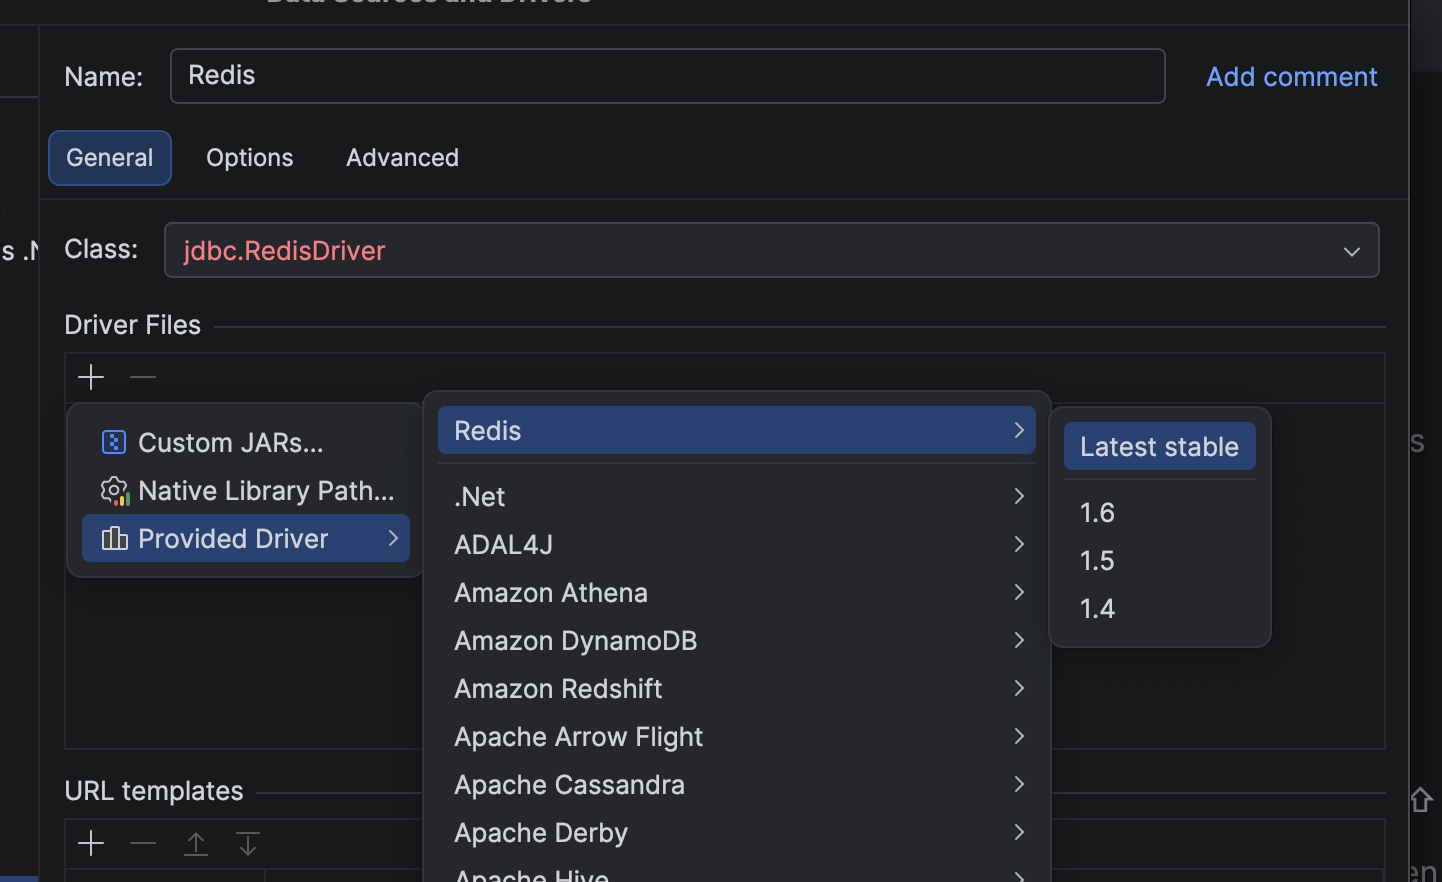
We then switch to the driver we want to use by clicking the option ‘Switch to ver 1.6.’
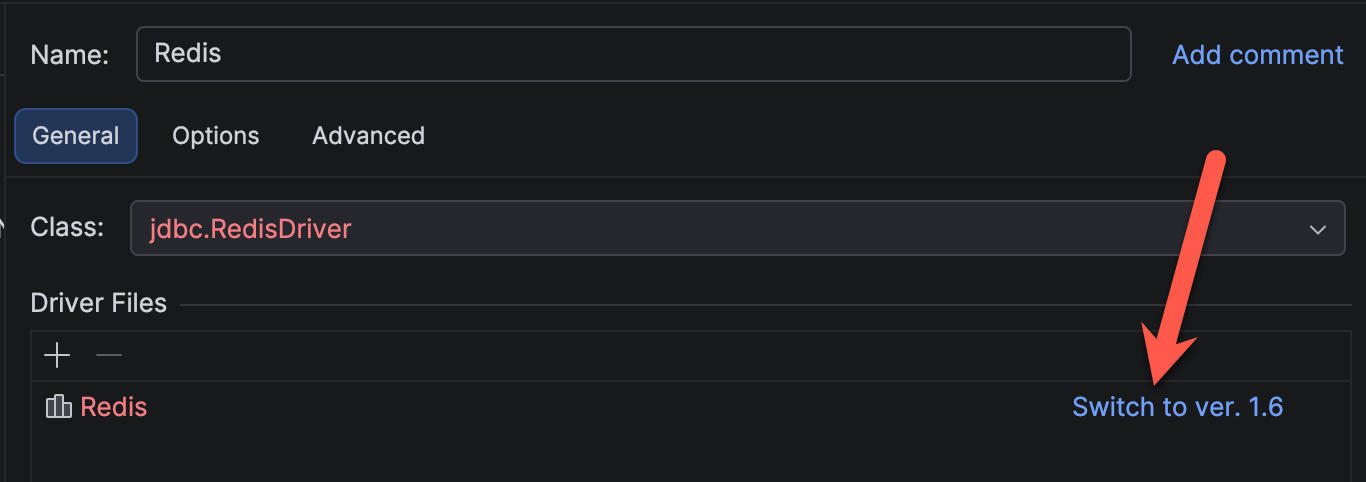
The screen should now look like this:
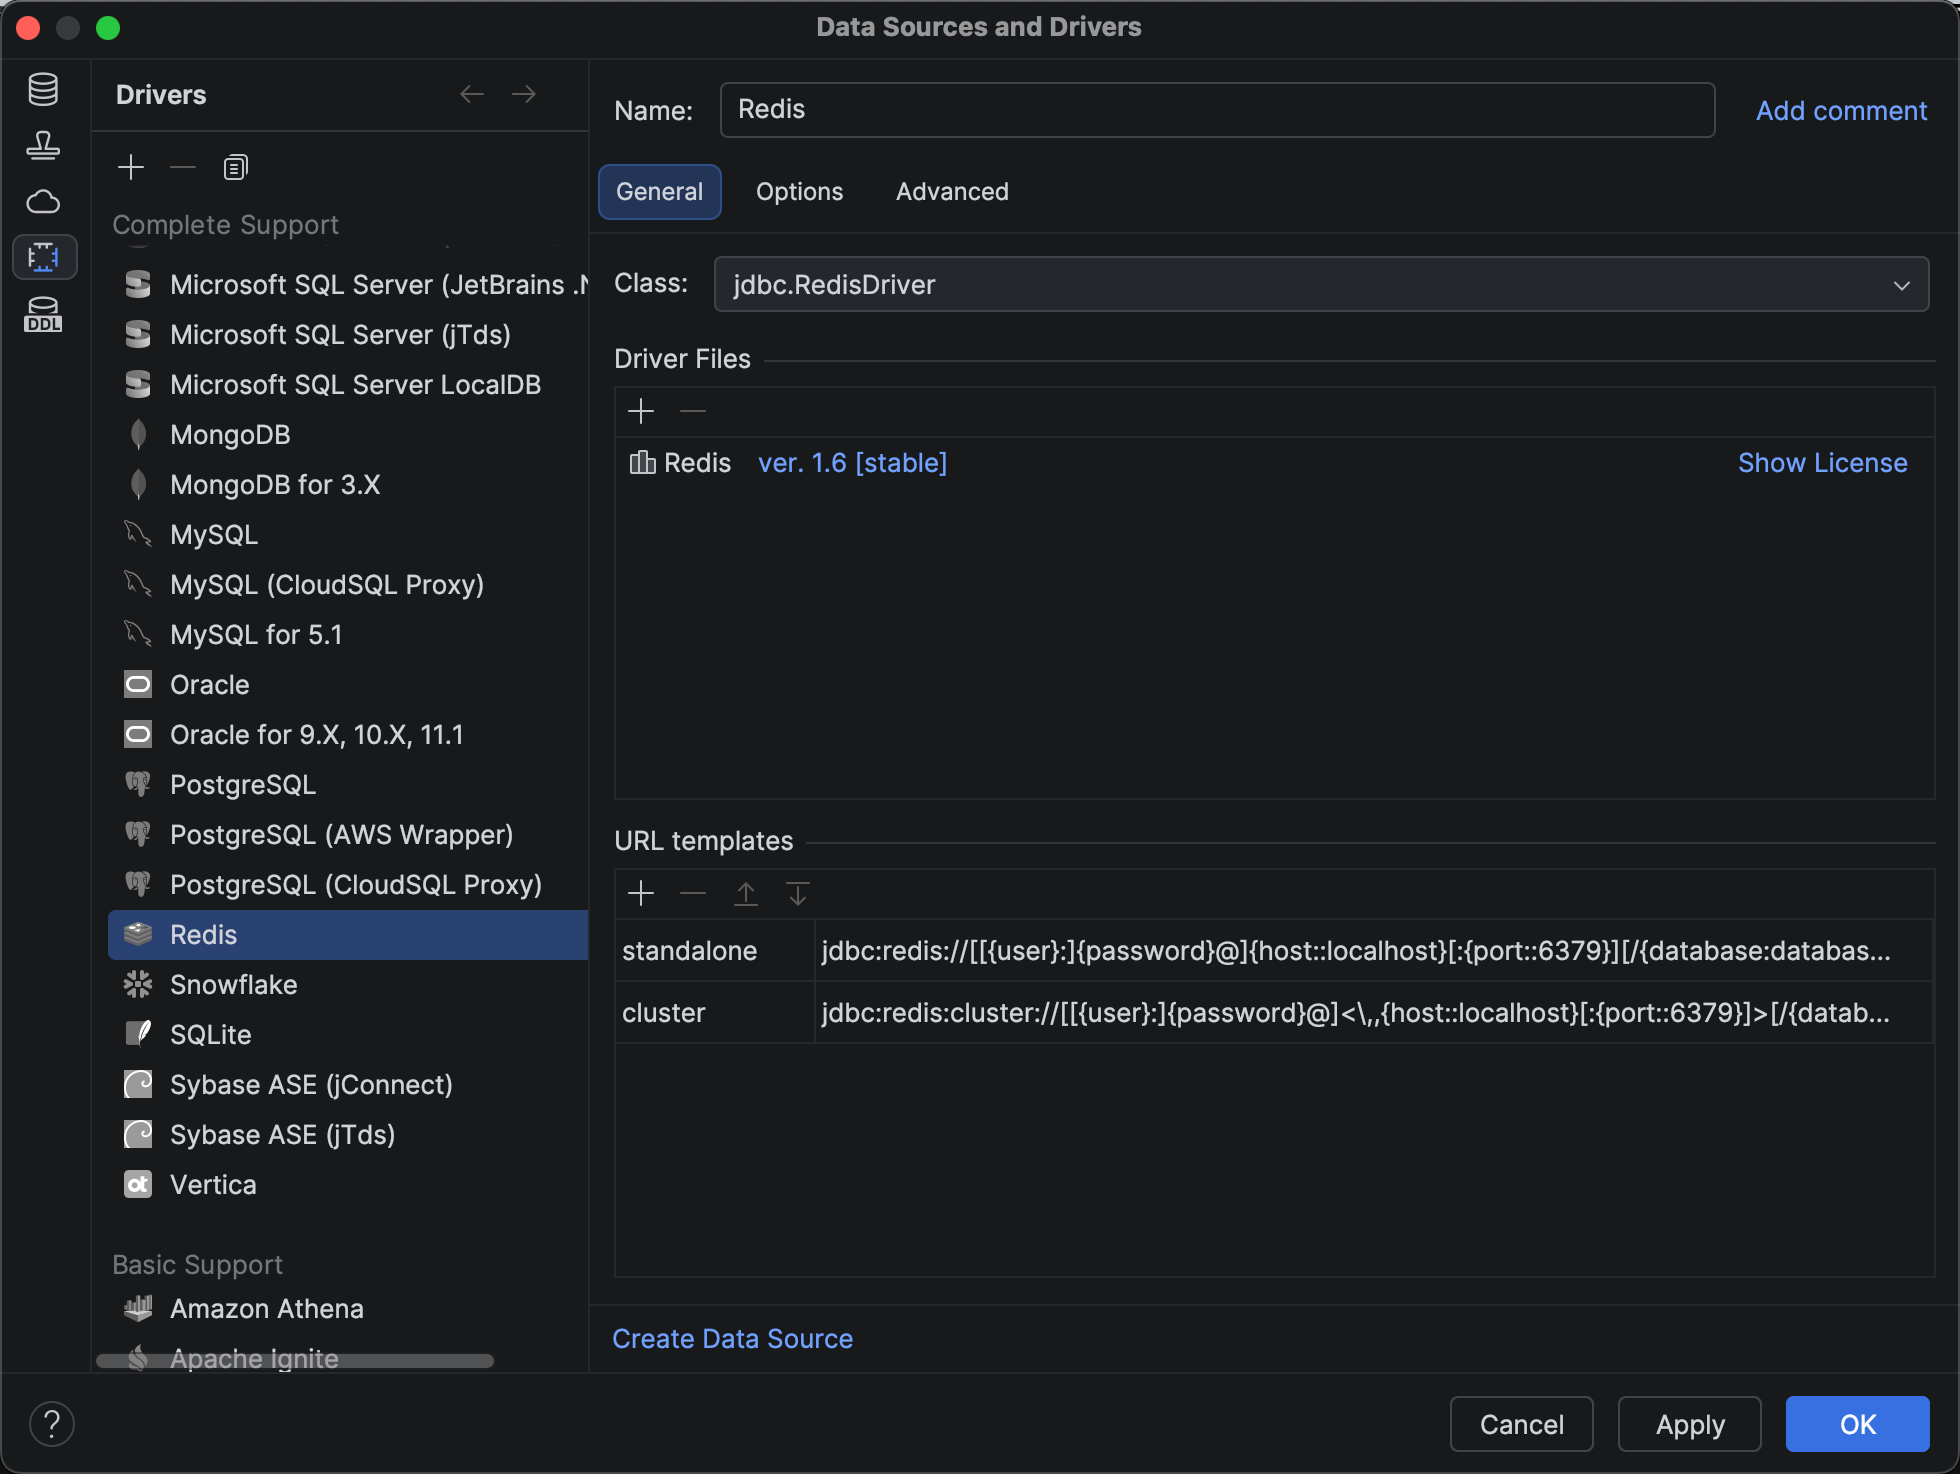
Now we are ready to connect.
From the main screen, the Database Explorer, click the icon to create a new connection.
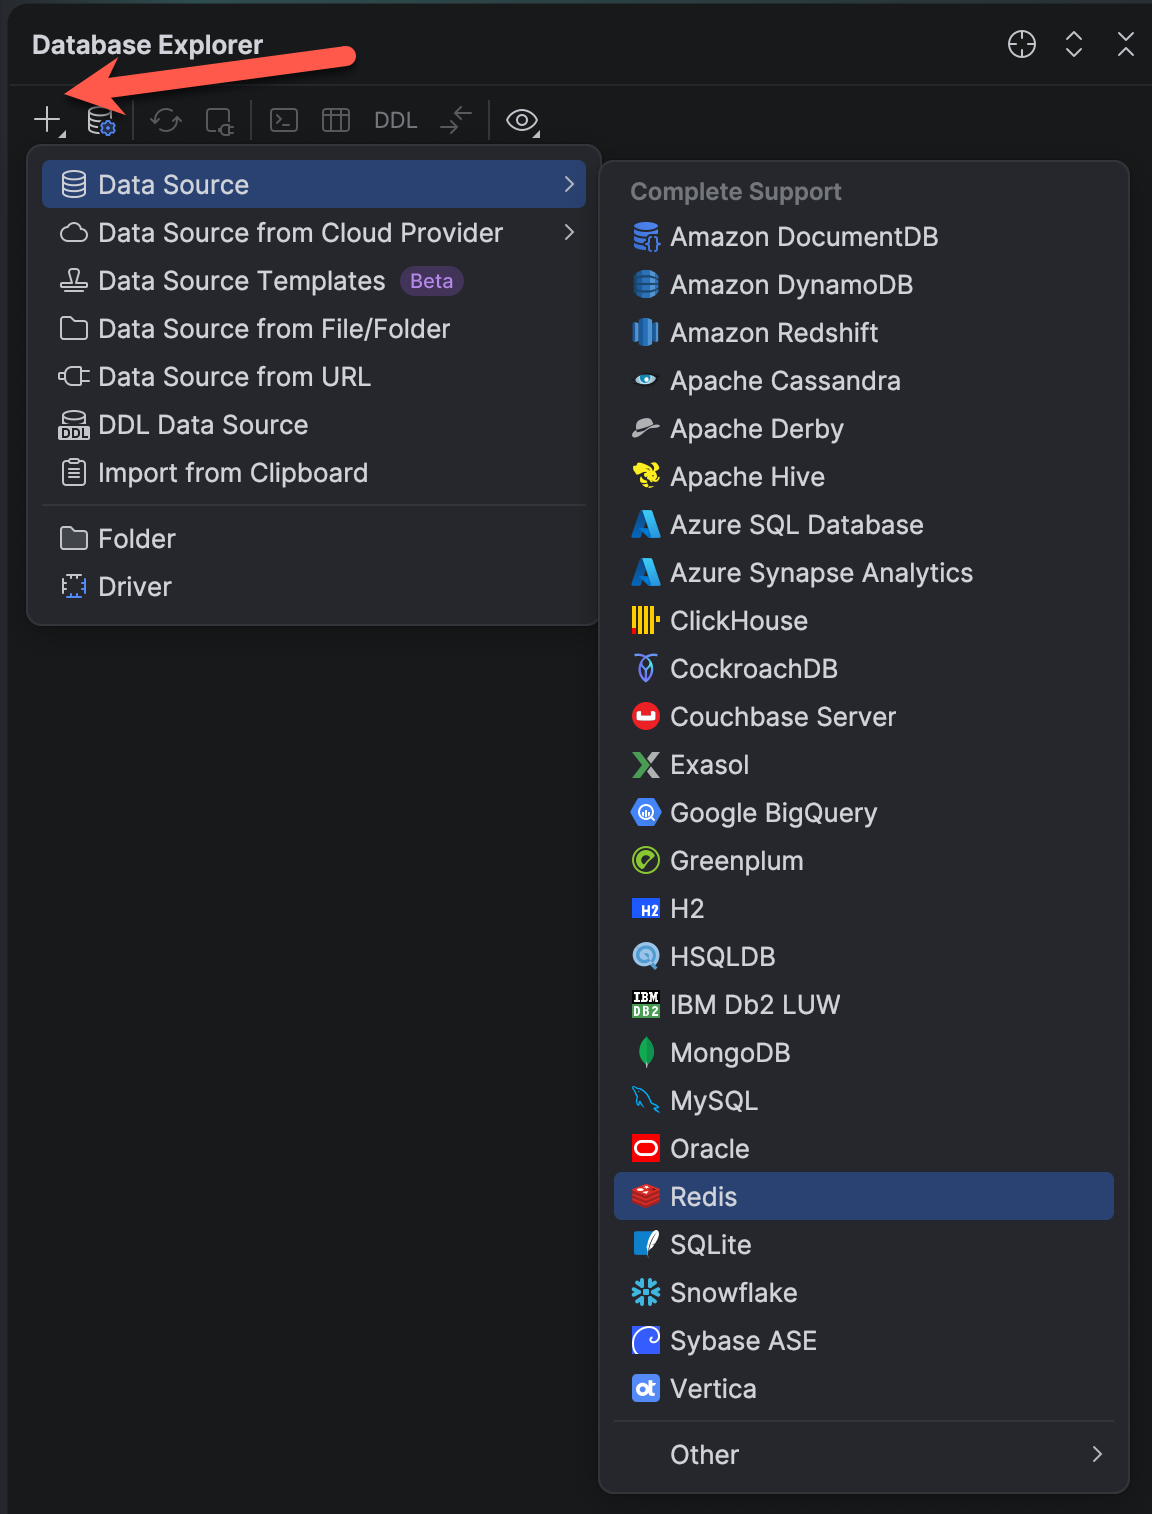
Choose Redis.
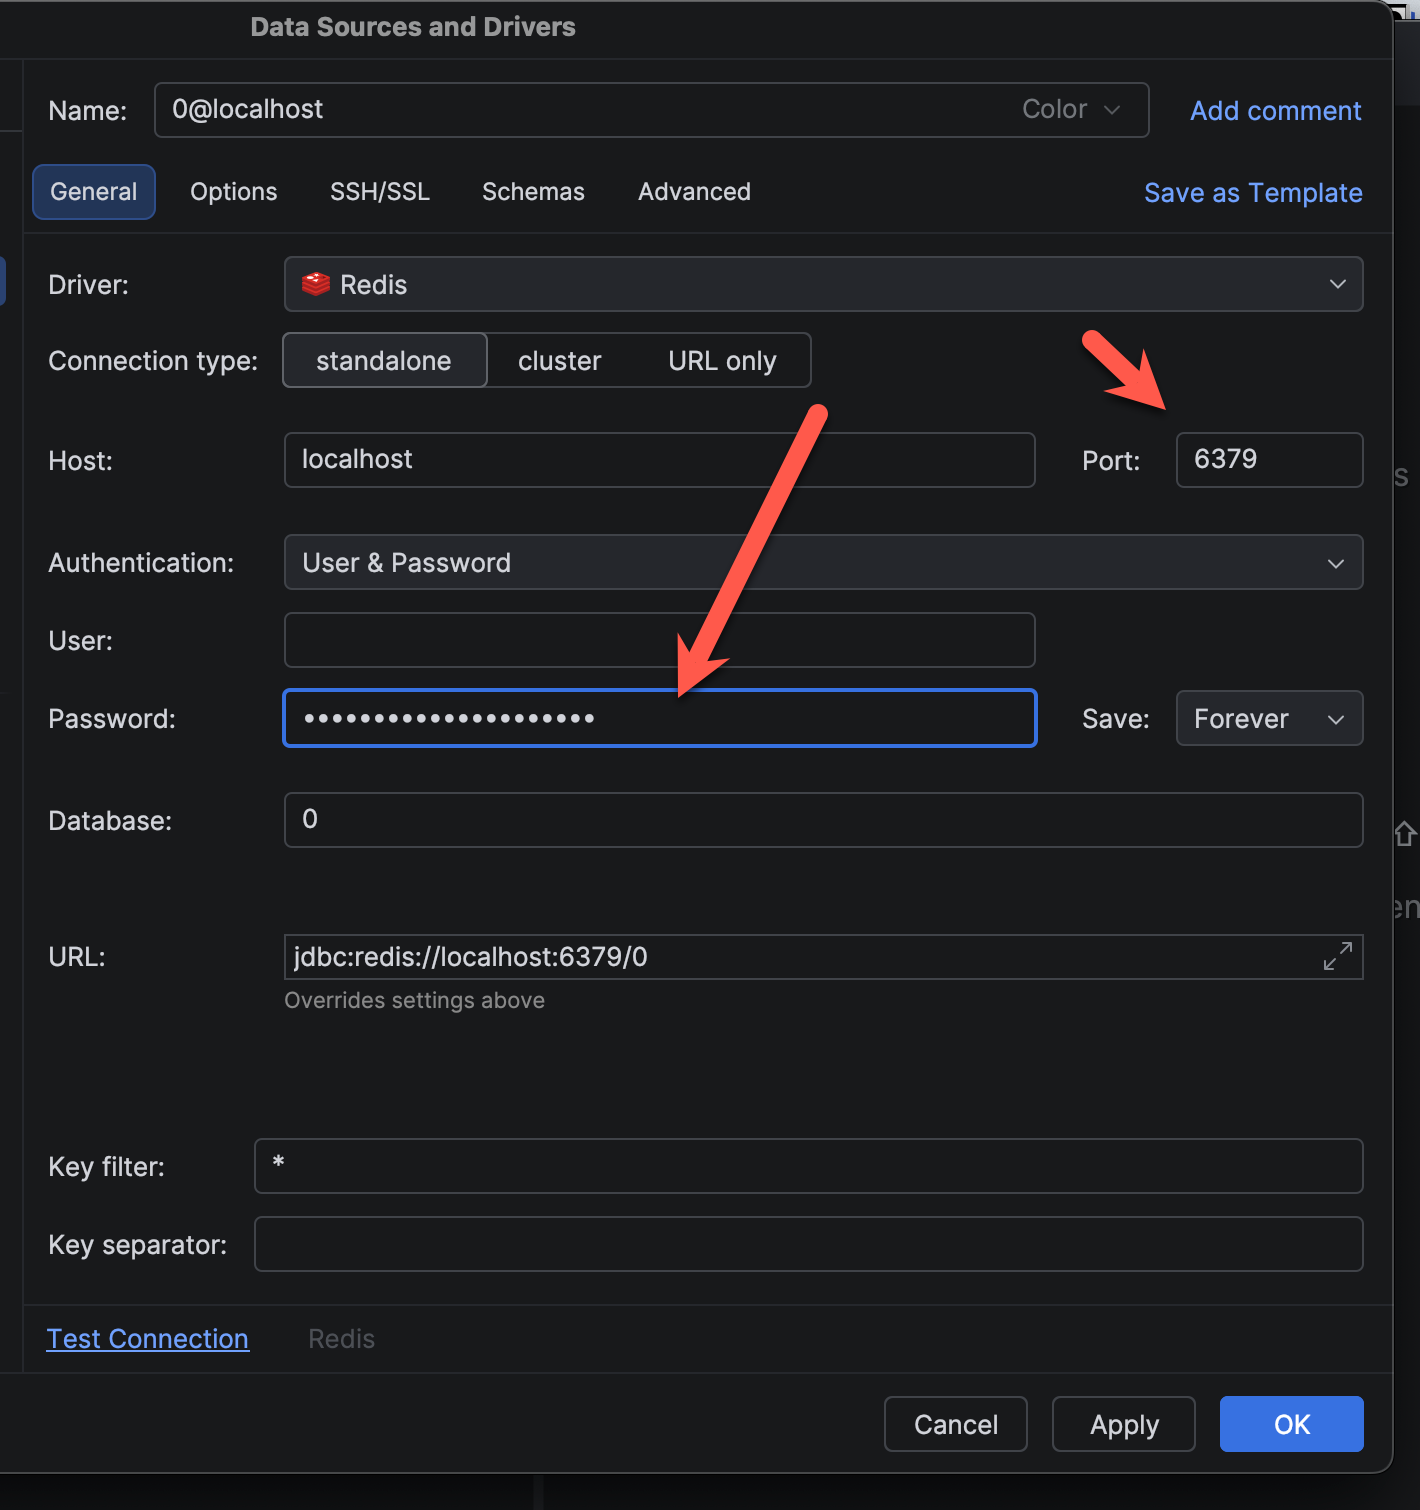
This will take you to a screen to configure your database connection.
For Redis, this is typically the port and password.
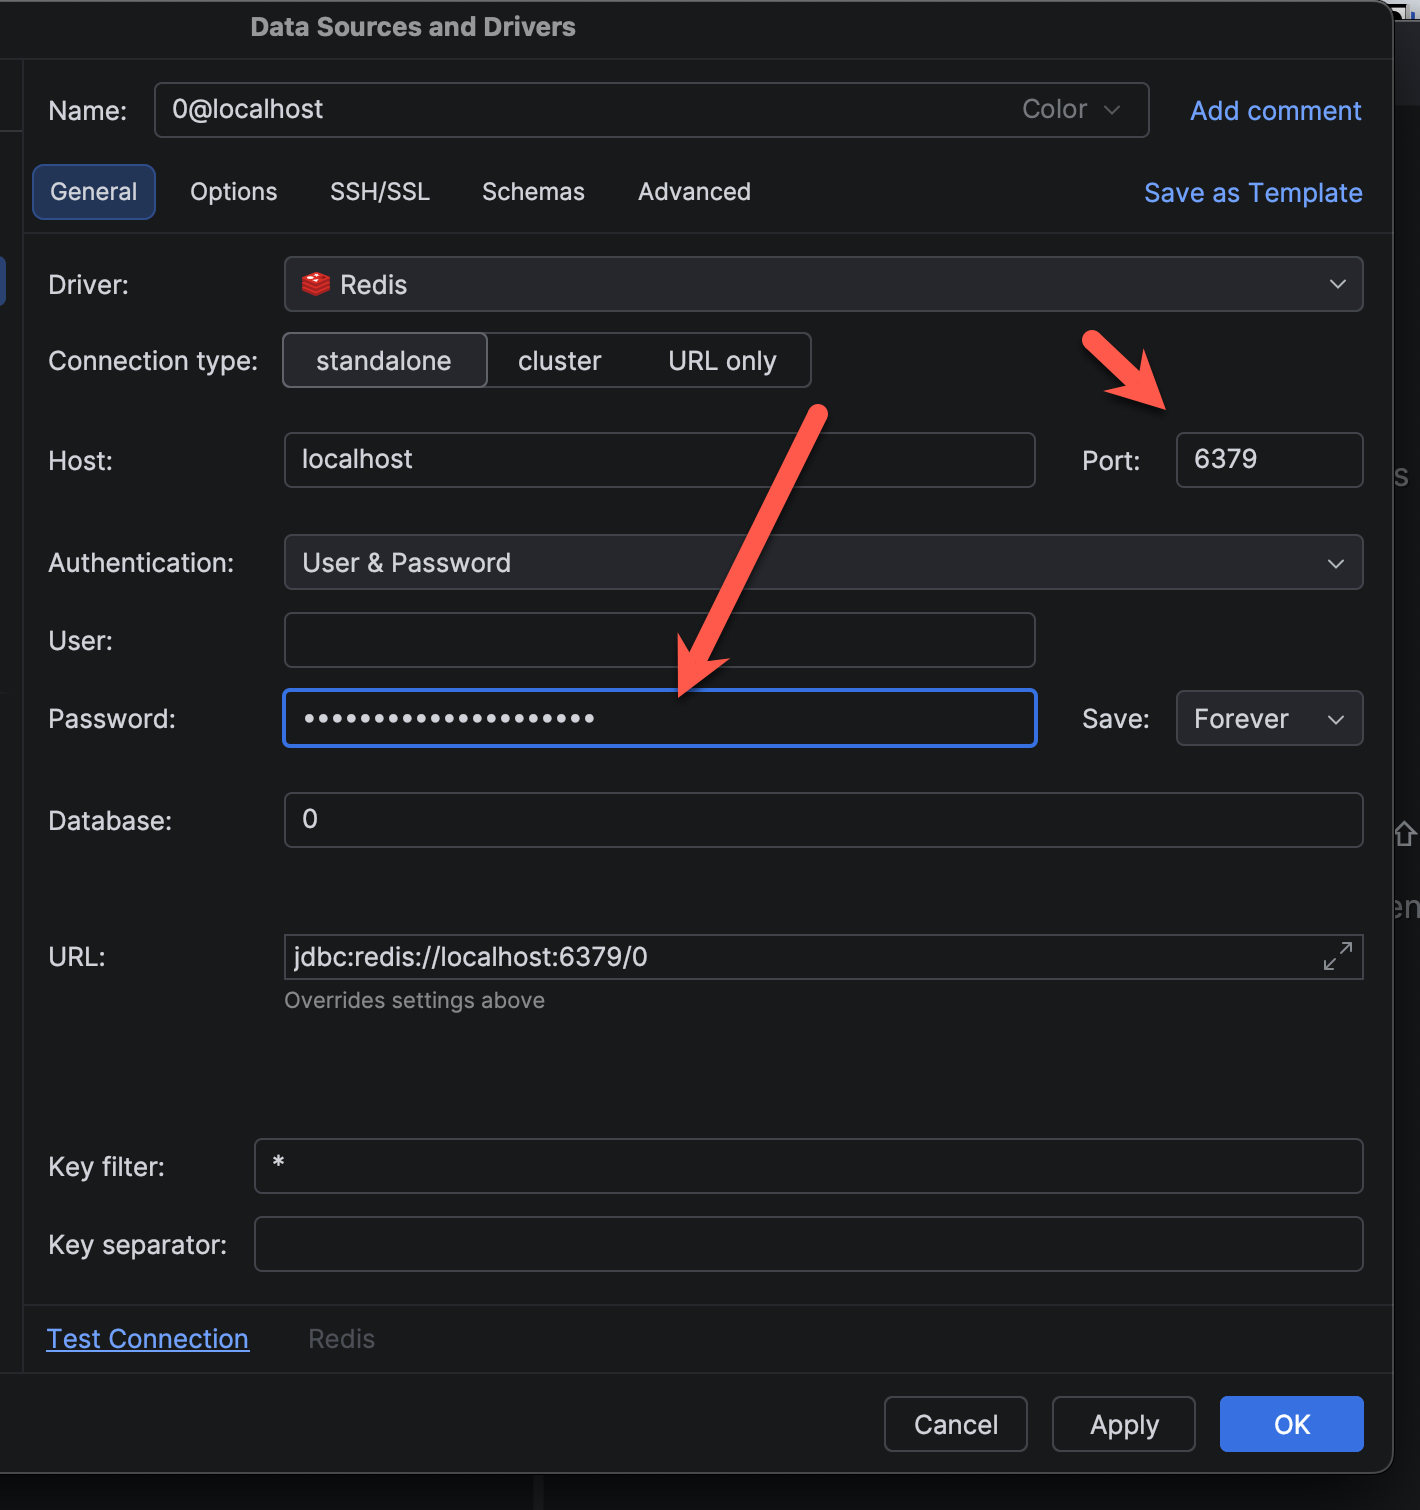
If you used the docker-compose.yaml from my previous post, the password is YourStrongPassword123. The port is the default, 6379.
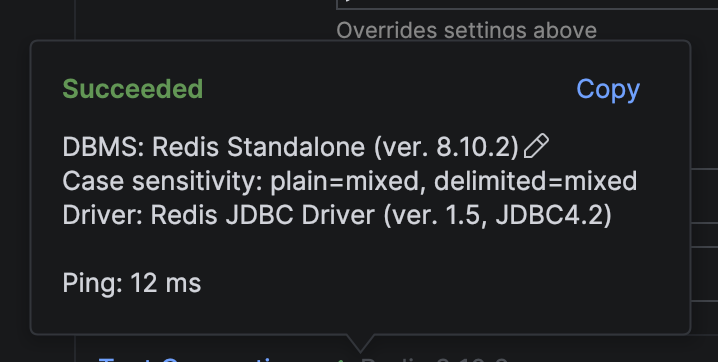
You can test the connection to ensure all is well:
You should see the following dialog:
Our connection should be ready to browse.
Expand the keys from the top level, usually a database named 0.
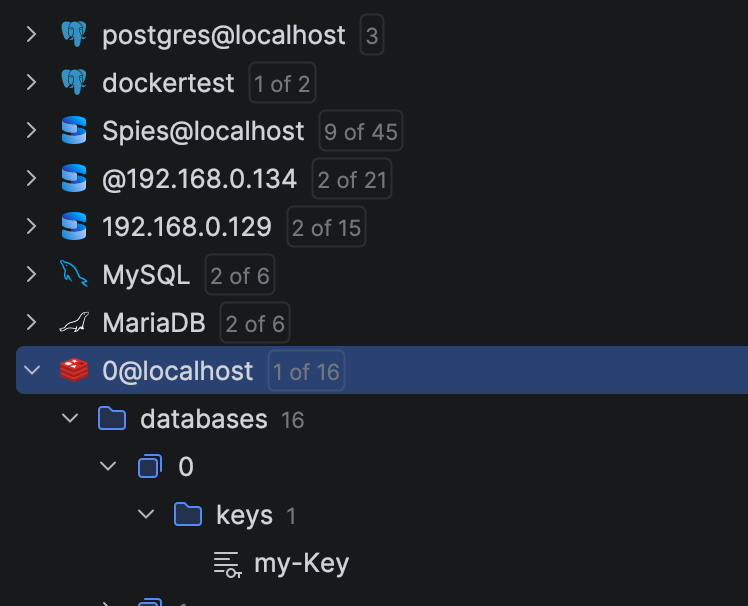
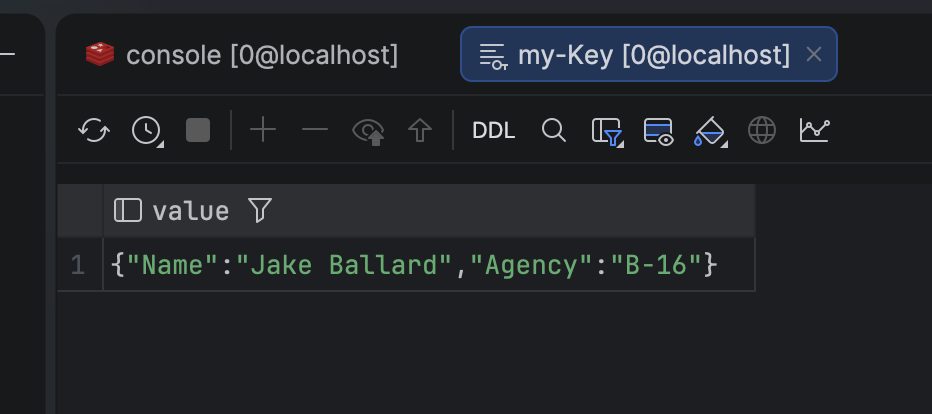
We can see our key, my-Key is available.
Double click to view the data.
TLDR
JetBrains DataGrip can be used to view Redis data.
Happy hacking!